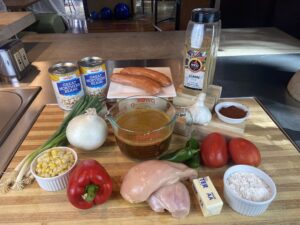
Yearly Archives: 2022

Make Your OWN Prepared Mustard!

Prepared mustard.

It’s in nearly every fridge or pantry in the modern world and used in, or on, thousands of dishes ranging from the classic and iconic, to today’s contemporary recipes.

The list is simply exhausting!

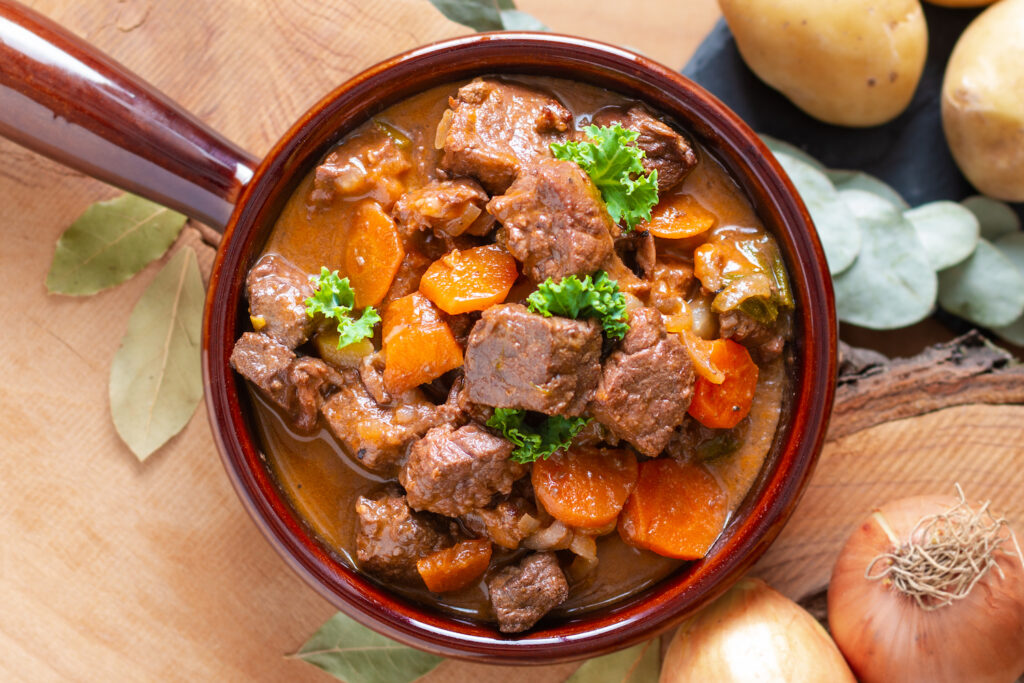
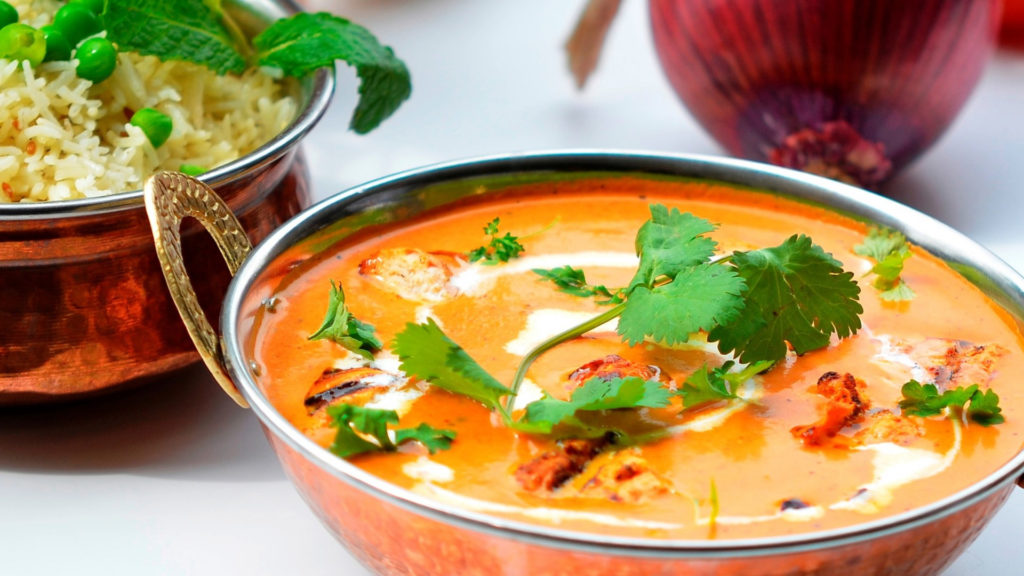
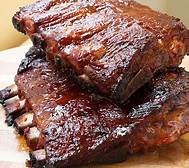
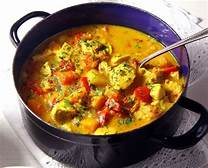
Salad dressings, sauces, deviled eggs, potato salad, beef, lamb, pork, seafood, and of course, on our beloved hot dogs.

Yet as ubiquitous as prepared mustard around the world, it’s a recipe rarely made in our homes, or, in professional kitchens?

Why is that?

Because it’s beyond simple to make.

Mustard surely gets enough love otherwise. In fact, there are numerous festivals all around the world extolling mustard’s culinary virtues.

From Napa Valley, California to Berlin, Germany, mustard festivals are held each year and feature famous dozens of contests.

Famous Chefs at these events offer demonstrations, and there are numerous opportunities to feast on fabulous dishes using mustard in every imaginable way.

How is prepared mustard made?

Let’s look at how a prepared mustard recipe is made. Maybe, along the way, you’ll discover that it’s something you’d really enjoy making in your kitchen.

“House” prepared mustard is a pretty impressive (and very simple) way to add a distinctive and artisanal flair to your menus.

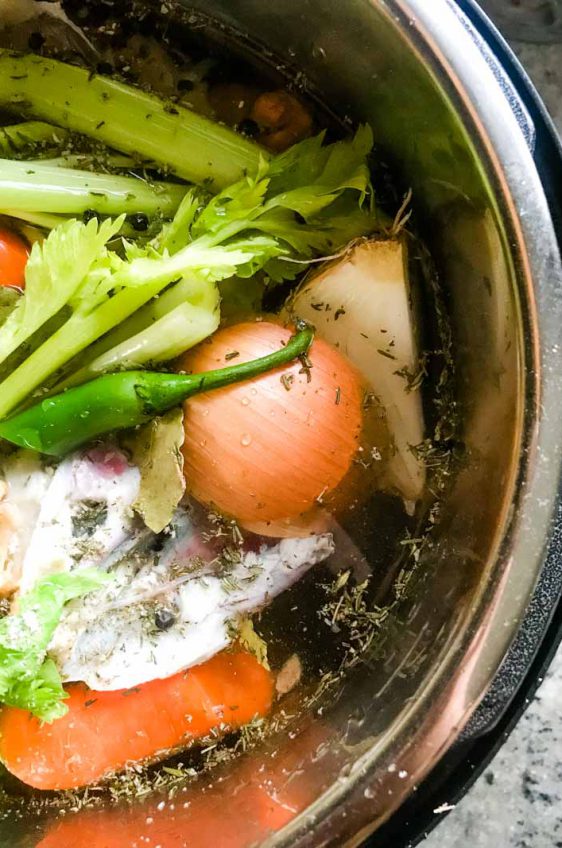
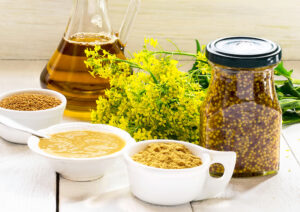
The basic ingredients needed to make mustard can be as simple as mustard and a liquid. The method however, can done in one of 2 ways.

  • Soak the whole seeds in the liquid, then blend or grind the mustard seeds into a paste. Or,
  • Grind the seeds to the desired fineness BEFORE adding your liquids. The additional grinding afterwards isn’t necessary.

Chemistry in action.

There’s a lot of chemical stuff going on when you make mustard.

The “heat, or bite” that comes from prepared mustard is within the seeds, and then it reacts with the liquids. So, breaking the seeds open is a part of the process.

It’s already been done for you with powdered mustard but it’s something you must do if you’re also using whole seeds.

Spicy or mild?

Temperature “heat”, (even hot water) negates much of the chemical reaction that give you the “spicey heat” component in prepared mustards.

If you want a mustard with more of a “bite” you should use cold water.

Warm water also works, but gives you more of a “mild” mustard reaction and flavor.

Using water alone, generally only gives you a few days (or less) of great mustard flavor. This can, (and should) be “stabilized”, by adding an acid (such as vinegar, lemon juice or horseradish) and some salt.

It also gives you that traditional taste, that most people love and accept.
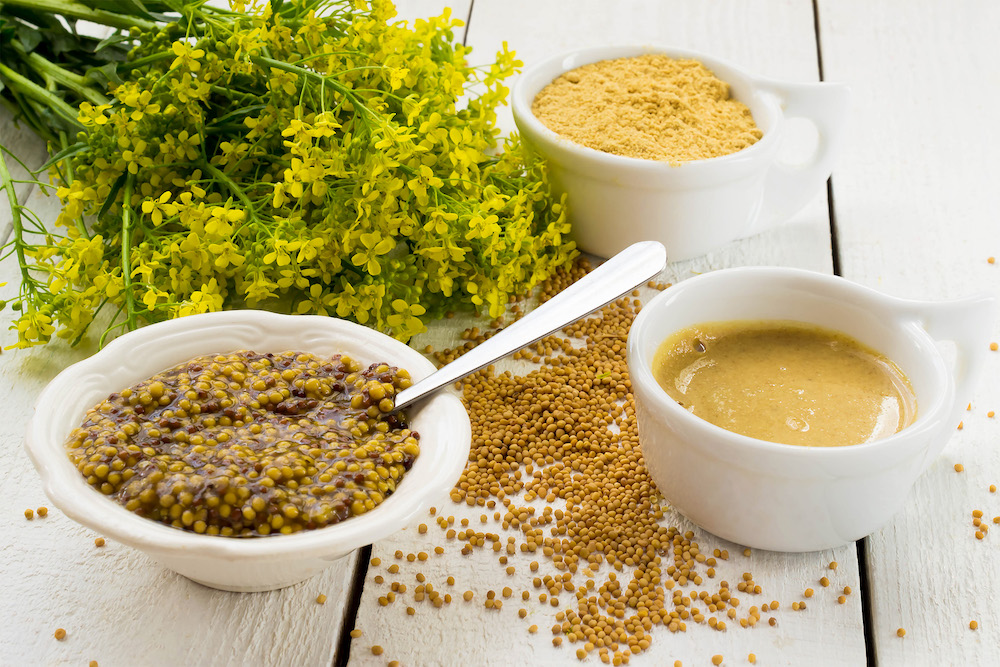
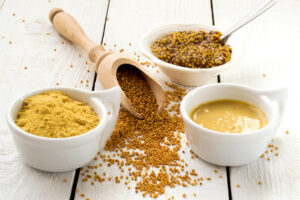
Which seeds?

Three seeds used to make mustards, they are: white, brown and black.

The white mustard plant, actually makes the mustard seeds that we call yellow, and they make a very pale-yellow powder, not the bright yellow you see in the bottle. They also make a rather mild mustard while, brown and black mustard, are a bit more “robust” in flavor.

The yellow “salad” mustard you see in your grocery store is typically made with the yellow seeds from the white mustard plant with turmeric spice added for color.

The ingredient statement on a bottle of Heinz mustard reads: DISTILLED WHITE VINEGAR, MUSTARD SEED, WATER, SALT, TURMERIC, NATURAL FLAVOR AND SPICES.

Brown mustard seeds are found in many premium prepared mustards including the popular Grey Poupon brand.

Black mustard seeds (called rai) are the most pungent and the least common seed to be found in American mustards but they are popular in Southern Indian cuisines.

Many people who enjoy making prepared mustards for their kitchen prefer to use at least 2 mustard seed varieties to create a more “complex” flavor.

A common combination is a hand or machine ground, brown seed, with a white (or yellow mustard powder added as a base).

Making your prepared mustard.

Since making a prepared mustard is rather easy, try making a batch using this recipe. We think you’ll agree that adding your own house-made mustard to your culinary repertoire might just plant the “seed” for many great recipe ideas.

We’ll use method number 2 with brown mustard seeds and yellow mustard powder.

Simple Prepared Mustard

Makes about 2 cups

½  cup brown mustard seeds

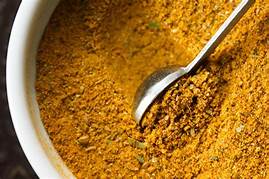
1  cup ground yellow mustard powder

1 tablespoon salt

2 tsp ground turmeric (optional)

2 tablespoons honey or brown sugar (optional)

1  cup cold water

¼ Cup + 1 tablespoon apple cider or white wine vinegar

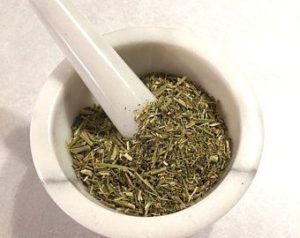
  1. Grind the whole mustard seeds for a few seconds in a spice grinder, or by hand with a mortar and pestle. Leave the seeds only coarsely ground to give the final prepared mustard some whole seed identity.
  2. Add the ground seeds into a non-reactive (Stainless steel or glass) mixing bowl and add the salt and mustard powder. If you choose to add the turmeric and sweetener, add that as well.
  3. Pour in the water, then mix together well. When everything is incorporated, let this rest for at least 15 minutes, then add the vinegar.
  4. Pour into a glass or plastic container and store in the fridge.
  5. Your mustard will initially seem thin, but fear not, as the liquids are absorbed by the mustard, it will thicken up in a day’s time.

Perhaps the hardest part of this recipe is waiting for the mustard to fully mature, which takes at least 2 days.

You’ll be tempted to taste it right away, even the next day, but fair warning, you’ll likely be disappointed because it will taste a bit bitter as the vinegar will just be beginning its to do its transformational “mellowing”.

Having said that, if it’s your first go at it, give it a try right away, and then a few days later. You’ll definitely notice the difference!

Once you’ve made your first batch, you may want to make some tweaks to suit your own personal tastes, or to fit a particular menu item you’ve created.

Among the things you can “experiment with” are:
  • Changing the mustard seeds to powder ratio.
  • Using beer or white wine as all or part of the water
  • Changing the sweetener
  • Adding some “heat”…chopped chiles or horseradish.
  • Adding chopped herbs (tarragon is a very popular option)

Your finished mustard, if stored properly under refrigeration, can last up to a year. Even longer if you process it as you would any canning technique.

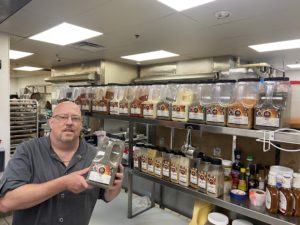
Of course, you’ll want to use a great source for your mustard seeds which is why so many Chefs buy their mustard seeds from the Red Goose Spice Company.

If your goal is to eventually make larger batches of mustard, we sell our mustard seeds in any size quantity that suits your seed needs.Prepared 

Braising vs. Stewing, What’s the Difference?

Call it stew or call it a pot roast, either way, the method used to cook this delicious entrée is called braising.

This simple cooking method has been around for centuries and has been adapted by many cultures to prepare some of their signature dishes such as; Beef Burgundy / Bourguignonne in France, Irish Stew, Carne Guisada in Spain and the Caribbean, and Birria in Mexico, just to name a few.

One thing that they all have in common, is that it uses “less tender” cuts of meat and “tenderizes” them by cooking with long, slow moist heat.

Often, a broth and vegetables are added for additional color, flavor and texture.

The distinction between a stew and pot roast is pretty blurred.

About the only “real” differences between these 2 dishes are that a stew uses smaller pieces of meat (usually 1 to 2 inches) versus a pot roast which uses a larger, 1 to 3 pound (or more) whole piece of meat.

The other difference is that stews generally use quite a bit more liquid, resulting in a finished dish that’s pretty much a hearty soup.

Whichever variation you prefer, the basic outcome is that this long, slow, moist cooking method slowly breaks down the connective tissues and collagen in the meat, resulting not only in a tender dish, but a delicious broth which you can thicken at the end.

A poor man’s meal? Not at all.

While stews and pot roasts were often thought of as a “working class” meal, this cooking method has recently been resurrected by some of the world’s most famous Chefs and versions of it have appeared on their very expensive menus to rave reviews.

Braising basics.

Braising is easy, but the success of its outcome is dependent on a few important things, the most important being the cut of meat you start with.

The most commonly braised meats are beef and veal. And the most popular cuts come from the Chuck, Bottom Round, Brisket, Flank, Short Ribs and Shank (Veal).

Vintage poster with a cow and its butchering scheme for restaurant or menu

Many people are surprised that the worst cuts of meat for braising are actually the most expensive and tender ones.

Cuts such as the rib, loin & tenderloin are very poor choices for braising.

Why?

First of all, they’re already tender so there is no reason to braise them.

Second, their muscle fiber is so fine, braising would only turn them into a shredded “beef spaghetti”.

Lastly, quite honestly, the less tender cuts have more flavor.

One of THE most popular cuts of beef for braising is short ribs. Ones that are both meaty and well marbled with evenly specs of fat throughout the meat.

There are so many recipes used in braising that we could go on forever with recipes that use wine, beer, sake, cider, tomato puree and fruit juices such as pineapple and cherry.

They’re all excellent in their own right.

Today, we’d like to share with you a braised beef recipe that’s one of our favorites.

You may like it SO much that you’ll be tempted to make a large batch of this recipe and freeze (yes freeze) portions of the braised beef, together with some of the sauce, so I can enjoy it more often.

What makes memorable short ribs?

Here’s are some criteria:

  1. Choose the right ribs. Meaty but with great specks of fat marbling throughout. Not too fatty, not too much bone.
  2. Ideally cut about 2” thick.
  3. Seared in hot oil on all sides until well caramelized to develop good color and flavor.
  4. Cooked in a VERY flavorful liquids, whether stock, wine or other. More about that later.
  5. Cooked VERY slowly (basically poached) over a long period of time (3 hours minimum) until the meat is falling off the bone tender, but not entirely “bleached” of all of its fat and natural beef flavor.
  6. Served with a sauce (made from the cooking liquid) that’s not too thick and seasoned just ever so slightly. It should be medium-dark in color, and almost “sticky” to the lips coming from the gelatin that’s naturally in the rib bones. And lastly, so savory, that you’ll enjoy it as much as the ribs themselves.

If you follow these basic guidelines, it will result in ribs that are neither dry, stringy or chewy.

Contrary to the usual rule of thumb that less tender cuts of meat are less expensive, pound per pound, short ribs (once braised and removed from the bone), are actually more expensive to make than beef tenderloin.

That alone will definitely change your notion of short ribs being a poor man’s meal!

Have we got a GREAT braising recipe for you!

Before you make this recipe, keep in mind that you really should have a heavy-gauged saucepot to sear, then to cook your beef ribs in.

It should also have a rather tight-fitting lid.

Second, while you CAN use a pressure cooker to shorten the cooking time, we prefer the longer, slower cooking method of braising in a covered pot, not a pressure cooker. This will develop more flavors in the sauce, and maintain the integrity of the meat shapes.

For the recipe below, here are a few additional tips:

  • Purchase a low-sodium soy sauce if possible.
  • Kitchen Basics brand beef stock works well.
  • Cut your veggies into large 1” pieces. Cutting them smaller will allow too much vegetable flavor into the sauce.
  • Any honey will do.

Soy & Honey Braised Short Ribs

Serves 3 to 4 persons

4 pounds  beef short ribs

2 tablespoons  vegetable oil

1 cup  white onion, cut 1” dice

½ cup  carrot, cut 1” dice

½ cup  celery, cut 1″ dice

1 each  garlic clove, chopped

1 ½ cups strong beef broth / stock

¼ cup  honey

½ cup  soy sauce, low sodium

2 tablespoons. Kitchen Bouquet® liquid seasoning (optional)

Pinch  dry oregano, crushed

Pinch  dry basil

To taste  salt and pepper

1 cup  rutabaga, cut in 1” pieces

1 cup  carrots, cut in 1” pieces

1 cup  red skin potatoes, cut in 1” pieces

As desired        Roux (cook together over medium heat approximately 3 to 5 minutes) 3 tablespoons of  butter with 1/3 cup all-purpose flour

  1. Heat oil in a heavy bottomed sauce pot, then sear the short ribs on all sides on medium high heat, until well browned. After each rib is browned, remove them from the pot and reserve them temporarily on a plate nearby.
  2. In that same sauce pot, sauté onions, carrots, celery and garlic for a few moments to soften, then add the reserved beef ribs back to the pot.
  3. Pour the beef stock, honey and soy sauce over the beef and vegetables.
  4. Add Kitchen Bouquet® (optional) and seasonings to the liquids and cover the pan tightly with a lid.
  5. Cook in a 300 F oven (covered) for three hours or until the largest piece of meat is fork tender, being careful NOT to break apart the meat pieces.
  6. Carefully remove meat from the cooking liquids then gently trim the meat away from the rib bones and place all the meat pieces in deep-sided service dish. Cover and keep warm.
  7. Strain the resulting cooking liquids back into the saucepot and add the second set of vegetables including the potatoes. Cover and simmer until those vegetables are tender, (approximately 20 to 30 minutes).
  8. With a skimmer or slotted spoon, remove the vegetables and add them to the reserved beef rib meat in the casserole dish.
  9. Skim off ALL the resulting fat from the surface of the remaining liquid and whisk in the prepared roux a little at a time, until the liquid is JUST thickened slightly.
  10. Strain sauce once more. Adjust the sauce’s seasonings with salt and pepper and ladle the sauce over the meat and vegetables in your casserole dish.
  11. Reserve additional sauce for those who would like more sauce.
  12. *Additionally, if you love mushrooms, sear large diced white mushrooms and serve over the ribs or stir them into the sauce.

White Bean Chicken Chili

For nearly everyone, when you think of chili, you think of a mahogany red colored stew of beef (and perhaps beans), with both savory and sweet spices.

It can be delicately spiced and very approachable, or it just might burn the leather off the soles of your shoes…, just because.

Whether mild or blistering hot, almost everyone agrees, it’s all about the beef, the tomatoes and the spices.

Chicken? Wait a minute…did you just say chicken?

If orange, is the new black.

Chicken (or turkey), is the new beef.

At least when it comes to chili.

How and when chicken chili came about is certainly a guess but it those extolling the virtues of poultry as a substitute for red meat certainly pushed its popularity to an all-time high in the past decade.

Most everyone agrees that our modern-day Chili Con Carne,  is an American adaptation of a similar Mexican, Canary Island or Moroccan dishes going back hundreds of years.

Being the melting pot that it is, Texans, more specifically San Antonians gradually assimilated these multiple culinary influences within what was their simple peasant style stew of hashed beef and peppers and, over time, turned a local stew, into a nationally renowned, destination worthy dish.

Known locally as a “bowl of red”, it was even the featured dish at the Chicago World’s Fair of 1893 at the San Antonio Chili Stand and then eventually made the official state food of Texas in 1977.

Beans.

If you think the subject of using chicken instead of red meat in chili might be sacrilegious to the chili purists, just bring up the subject of beans.

It’s not a matter of which beans or what proportion to meat, it’s a matter of no beans.

No, no, no and #@!*%#! no.

Chili today.

Purists aside, the real “power” behind chili is The International Chili Society, (ICS) which holds the World Championship Chili Cook-off.

It was formed in 1967 and divides the chili competitions into the following categories:

  • Traditional Red
  • Chili Verde
  • Homestyle Chili
  • Veggie Chili

And you might be interested to know that not only does the Homestyle Chili allow the use of ANY meat (you go CHICKEN!) but the recipes MUST have beans in them!

And, well, that’s a good thing because the International Chili Society’s World Cook-Off’s presenting sponsor, is none other than….

Wait for it…..

Bush’s Best beans….

If you’d like more information about the International Chili Society or any of its upcoming competitions, hit the following link with your wooden spoon…

https://chilicookoff.com/

And, as promised, here is the Red Goose recipe for our delicious White Bean Chicken Chili

Makes about 3 quarts.

12 oz  boneless, skinless chicken breasts

2 links  chicken Italian sausage

½ stick butter

1/3 cup all-purpose flour

1 tablespoon vegetable oil

1 tablespoon minced garlic

1 tablespoon minced jalapeno

½ cup  chopped white onion

1 pound  ground chicken meat

½ cup  diced red bell pepper

¼ cup  chopped green onion

¾ cup  diced (seeded) Roma tomato

½ cup   cut corn

2 cups  Northern beans, drained

3 cups  strong chicken stock

2 tablespoons ground cumin

¼ cup  dark chili powder

to taste  ground black pepper and salt

Optional garnish: sour cream, green onions, red bell pepper and fresh jalapeno

  1. Begin my grilling both the 12 ounces of chicken breast and 2 links of chicken Italian sausage, then finish cooking them to 165 F in a 350 F oven. Cool and dice into ½” pieces.
  2. In a small saucepan, cook together the butter and flour over medium heat 3 to 5 minutes, making a roux. Remove from the heat and allow to cool for later use.
  3. In a medium-large sauce pot, sauté the onions, garlic and jalapeno with vegetable oil, over medium heat for 2 to 3 minutes.
  4. Add the ground chicken and cook until opaque and fully done.
  5. Add the red bell pepper, green onions and Roma tomato, cut corn, Northern beans, diced grilled chicken and cut chicken Italian sausage. Stir over medium heat for 5 minutes.
  6. Add the chicken stock and the roux and stir together well until it reaches a simmer. Simmer 5 to 10 minutes.
  7. Add the cumin, chili powder, ground pepper and salt to taste. Simmer slowly an additional 20 minutes.
  8. Serve with sour cream, green onions, slivers of red bell pepper and a thin slice of fresh jalapeno.

Oktoberfest Soft Pretzels with Everything Topping

Long since known for its blast on bagels, Red Goose Everything seasoning is a fabulous topping on Soft Pretzels!

Enjoy these delicious pretzels with mustard or just warm, fresh out of the oven, all on their own.

Red Goose Oktoberfest Soft Pretzels with Everything Topping 

Makes 6 – 5 ounce Pretzel Sticks

2 lbs.                 Frozen Bread or Pizza Dough (Any Brand)

3/4 Cup             Baking Soda

2 Qts.                Water

½ Cup               Red Goose Everything Seasoning

  1. Preheat oven to 375 degrees F.
  2. Thaw frozen bread dough in the refrigerator overnight or until completely soft and pliable.
  3. Place the water in a non-reactive saucepan or metal casserole dish of at least 2” of depth and 9” to 10” in diameter then stir in the baking soda until it dissolves. Place the solution over medium low heat until it JUST simmers.
  4. Portion the dough into 6 equal pieces approximately 5 + ounces each.
  5. Roll out each portion of dough into an 8″ long, thick stick. Repeat for the remaining pieces.
  6. Let the sticks rest 5 minutes.
  7. Place the dough sticks in the gently simmering baking water and poach on both sides approximately 2 to 3 minutes rolling over the sticks as they “poach”.
  8. Remove the sticks with a slotted spatula and place on a non-stick baking pan (approximately 2″ apart from one another). You may also want to spray this pan lightly with a non-stick vegetable spray.
  9. While the dough sticks are still moist and VERY sticky, sprinkle evenly, and heavily, with the EVERYTHING SEASONING so that it will stick to the dough.
  10. Before baking, slash each dough stick with a sharp knife with diagonal cuts approximately 1/4″ deep and 1″ to 2″ apart. Bake for approximately 20 to 30 minutes or until the “Pretzel Loaves” are medium brown and baked through.
  11. Serve plain or with your favorite mustard.


Sesame, From Tahini to the Arabian Nights

For a lot of Chefs, their first encounter with sesame seeds probably came with a “jingle” that went: “Two all-beef patties, special sauce, lettuce, cheese, pickles, onions, on a…”

And you know the rest.

https://youtu.be/jSmAibfvCeU

Big burger and chips on the table

Of course, later in life, you learn that the LEAST of what sesame seeds can offer to the culinary world…

Is a topping on a bun.

But the fact remains that at one time, the vast majority of the sesame seed crop of Mexico went directly to McDonalds for toppings on their famous hamburger buns.

You still see sesame seeds on some bakery products in the United States but our country is nowhere near the leading importer of sesame seeds, nor its uses.

Sesameis a flowering plant grown in tropical regions around the world and is cultivated for its edible seeds, which grow in pods.

Sesame is thought to be the oldest oil-seed crop known to humanity and has one of the highest oil contents of any see and world production of sesame seeds in 2018 was 6 million metric tons.

Golden sesame

Interestingly, the top exporters of sesame seeds are India, Burma, Sudan Tanzania, China and Pakistan and India.

The top importers of sesame seeds are China, Turkey, Japan, South Korea and Israel.

From a nutrition perspective, eating sesame seeds have many “potential” health benefits and was once thought to have mystical powers, as first mentioned in the command “Open sesame!,” used in the Arabian Nights tale of “Ali Baba and the Forty Thieves.”

Albeit a poorly remembrance of the actual command, which was, “open says me”, (which opened the secret cave’s entrance), “Open Sesame!” made its way into common expression anyway.

Many studies have extolled sesame seeds virtues since, due to the numerous vitamins and minerals they contain. The health benefits of sesame seeds seem almost endless. A few highlights include claims such as reducing your risk of heart disease, certain cancers, obesity, bone health, type 2 diabetes, and the list goes on.

Unfortunately, other studies say that you REALLY love sesame seeds in order to see any significant results from eating sesame seeds.

Like handfuls a day.

With a rich, nutty flavor, it’s no wonder that sesame seeds are used as garnishment and in foods all over the world.

From toppings on breads to thickeners in soups and savory dishes, sweets and coffee-like drinks with exotic names like: ”Benne”, Wangila, Chikki, Halvah, Goma-Dofuand and in Za’atar, there’s no shortage of recipes and spice blends that use this diverse seed.

But perhaps the most well-known food product that uses sesame seeds is Tahini, a paste made from sesame seeds and a key ingredient in the classic dip, Hummus.

Hummus, the Turkish word for mashed chick pea, is one of the oldest (prepared) foods, dating back to ancient Egypt.

There was time, that if you loved hummus, you’d probably only find it in a local specialty store, or hidden somewhere in the back aisles of one of the more popular national chains.

Today, it’s one of THE most popular dips in America.

You can of course buy Tahini to make your hummus but it’s SO easy to make and tastes infinitely better so why not make it yourself.

The recipe is below but you can watch it being made right here!

Tahini

Makes 3 Cups

1 Cup                        Sesame Seeds

¼ to 1/3 Cup             Olive Oil

  1. Place the sesame seeds (by themselves), in a frying pan or skillet on medium low heat, stirring often until the sesame seeds begin to lightly color and give off a toasty aroma.
  2. Remove the seeds from the heat and fully cool.
  3. Place the seeds in a food processor and blend until a paste is created.
  4. Add the olive oil in 2 or 3 stages, scraping down between each addition.
  5. Blend until the desired smoothness is achieved.

Classic Hummus

Makes 3+ Cups

2 – 16 oz Cans                  Canned Chick Peas

1 to 2 teaspoons                Garlic, Fresh, Chopped

1/3 Cup                              Tahini Paste

½                                        Lemon, Freshly Squeezed Juice

3 TBSP                               Olive Oil

1/3 Cup                              Cold Water (Or More as Needed)

1 tsp                                   Sea Salt (or Kosher Salt)

1/4 tsp                                Hot Sauce (Tabasco or Other)

  1. Drain off all liquids from the canned chick peas and rinse well with cold water to remove all of the canned juices.
  2. Add chick peas to a food processor using an “s” blade attachment.
  3. Add the fresh garlic, tahini paste, lemon juice and olive oil.
  4. Blend on medium then high speed 1 to 2 minutes, stopping occasionally to scrape down the sides of the bowl. You want to make this paste rather smooth before adding the water.
  5. Begin adding the cold water in 2 to 3 steps, blending each time and scraping down the sides of the bowl between additions. The resulting hummus should be smooth and creamy looking and easily hold its shape when mounded.
  6. When you feel you have the consistency you want, add the salt and hot sauce and blend one last time for 15 to 30 seconds.

To the recipe above, once finished, you can blend in, OR add other ingredients, as toppings. These are a few of our favorites.

Tarragon, Bearnaise and Beyond…

If there was a Mount Rushmore of herbs, tarragon would certainly be a strong contender.

Its glossy, slender leaves and highly aromatic, licorice/anise-like flavor, (with a bit of peppery, mint finish), is unmistakable in any dish it’s used in.

And for good reason.

Tarragon is one of the key components of the French herbs mixture known as “Fines Herbes”, which “classically”, consists of: tarragon, chervil, parsley and chives.

Some say that tarragon provides an elegant addition to so many recipes, from salads, almost ANY protein, and numerous soups and sauces as well.

Others say that it’s licorice flavor makes it a “love it, or hate it” herb. Much in the same way that some people feel about cilantro.

But make no mistake, this herb is a star among the many who know that tarragon is an essential herb in any kitchen.

The most common tarragon used in cooking is the French variety, which pairs brilliantly with chicken, fish, and in egg dishes.

With the addition of garlic and shallots, it’s also remarkable in compound butter used as a garnish over char-grilled beef steaks.

Additional varieties of tarragon include Spanish/Mexican and Russian.

But perhaps the MOST widely known use for tarragon is in the classic sauce, Bearnaise, which is a derivative of Hollandaise sauce. It’s often used not just once, but 3 times within the recipe. First as tarragon vinegar, the second, as part of the tarragon reduction, and lastly as a chopped garnish.

Each form of tarragon, introduces its own unique contribution of flavors which meld together so completely in the final sauce.

The French love this classic herb, but it’s also popular in other countries around the world, and used in salads, stews, soups, pickles, pastries and even soft drinks!

It’s also an herb which can be used in the same dish both dry and fresh as BOTH uses take on their own unique flavor properties and truly complement each other in the recipe. Such as is the case with sauce Bearnaise.

Dry VS Fresh

Tarragon’s oils intensify during the drying process.

When using dry tarragon versus fresh chopped tarragon in a recipe, the usual substitution ratio is 1 tsp dry to equal 1 tablespoon of fresh.

When you mention the word, “tarragon” nearly anyone would immediately associate it with “Sauce Bearnaise” and for that reason, it’s a good recipe to share with you here.

Bearnaise is one of 5 “Grand Sauces” that all chefs and devoted cooks learn to make early on. It’s also one, that non-professionals are told is just too difficult to even attempt.

Hollandaise sauce is made from only 4 basic ingredients, but it’s the 2 main ingredients (egg yolks and butter) that can give you real headaches if you don’t to pay attention to what you’re doing.

Here’s how you avoid the headaches, and to show you, we’ll make an average-sized recipe of Bearnaise sauce.

Start by making the tarragon Bearnaise reduction which you will add to the Hollandaise sauce once it is finished.

Set this reduction aside, THEN begin your Hollandaise sauce.

Bearnaise Reduction for Hollandaise Sauce

2 TBSP                      Dried Tarragon Leaves

1 TBSP                      Chopped Fresh Shallots

¼ Cup                        Cider or Tarragon Vinegar

¼ Cup                        White Wine (nothing too sweet)

¼ tsp                          Cracked Black Pepper

  1. Simmer these ingredients together in a small saucepan until reduced to a wet paste. Be careful not to burn it!
  2. Set it aside and NOW begin your Hollandaise sauce.

Hollandaise Sauce

Makes about 1 Cup

  1. Before you begin to cook your egg yolks, in a microwave on the defrost setting, melt 1 ½ sticks of butter until the fat separates, and then skim off that clarified butter and reserve.
  2. Squeeze the juice from a half lemon and reserve.
  3. Choosing the right bowl and saucepan to make your hollandaise is super important. You want about a small-to-medium-sized saucepan and a mixing bowl that nests within the saucepan, leaving at least an inch of space from the bottom and an inch or so lip at the top. This way, you can easily lift the bowl in and out of the pan as you cook your yolks.
  4. Put only a half inch of water in your saucepan and bring it to a simmer. You should have a space between the bottom of your mixing bowl and the water, and that will mean your egg mixture will be cooking gently over the steam and not directly on the water.
  5. Place 2 egg yolks in your mixing bowl, and for each yolk, a half egg shell of water–in this case 2 half egg shells worth.
  6. This step will help you to cook your egg yolks into a “pudding.” Place the bowl over the simmering water, and using a whisk, beat the egg yolk mixture on and off the steam heat (about 15 seconds each round). This method will take a bit longer to turn this raw mixture into a thickened egg pudding, but it will also prevent your mixture from cooking too fast and turning into scrambled eggs.
  7. When the egg mixture is sufficiently cooked, the whisk will create tracks in the mixture. This will let you know it’s time for the next step.
  8. Remove the water from the saucepan and lay a damp kitchen towel or paper towel over its mouth. Replace your bowl and nest it in snugly. This neat trick will allow you to do the next step more easily.
  9. This step gets everyone in trouble now, but if you just take your time, there’s NO reason you should ever have a problem. You’re going to make an emulsion here by SLOWLY–and the key word is SLOWLY–adding the clarified butter to the cooked egg “pudding.” That means whisking somewhat briskly while adding the clarified butter in very small amounts, especially at first.
  10. Start by drizzling in less than a tablespoon; don’t dump it in all at once. Drizzle it in a thin stream. Once that is incorporated, add another, the same way.
  11. After the 3rd tablespoon, you’ll notice the mixture is getting thicker. Now is when you begin to whisk in a bit of your squeezed lemon juice–about a teaspoon. Continue alternating butter and lemon juice until they’re both used up.
  12. The hard part is over, now all you have to do is add the tarragon mixture you made earlier. Whisk it in briskly and season with a pinch of salt if you like.

Of course, tarragon is one of THE most popular herbs sold at the Red Goose Spice Company. We stock the French variety and is available in any size container or bulk box you prefer.

Red Goose Welcomes Cattleman’s Meats as Another Valued Customer

Having great partners in the business world is not only a blessing, but an affirmation that you’re doing something right.

At the Red Goose Spice Company, one of our missions is to partner with Chef’s, restauranteurs, clubs, hotels, and major food service corporations throughout the United States to provide them with the seasonings they count on to provide the high-quality dishes on their menus.

Not JUST containers of oregano, granulated garlic, or paprika, but custom blended seasonings, rubs, flours and mixes as well.

All destined to be used throughout their facility, in many different ways, to produce innumerous products they prepare for their customers.

Chefs who work in the ever-growing Gourmet Grocery Retail sector of the food service business, not only see products from The Red Goose Spice Company in their kitchens, but on their grocery store shelves as well.

Both Red Goose and Savvy Goose provide retail packaged products to give the “every day” cook at home “Chef”, the opportunity to use the same seasonings that the “pros” use.

Two examples located in the Southeast, Detroit are the four Nino Salvaggio International Marketplace stores and more recently, Cattleman’s Meats, located in Centerline and Taylor, Michigan.

In both cases, the retail products produced by Savvy Goose are under the Savvy Goose brand, while all the traditional herbs, spices and blends uses for everyday cooking are produced and co-packed by Red Goose under the Salvaggio and Cattleman’s brand labels respectively.

Both markets also take advantage of Red Goose’s ability to create proprietary blends which are only offered at their locations.

Executive Chef Michael Key’s, at Cattleman’s Meats not only oversees all of the cold prepared foods offered in both full and packaged self-service, but full-service hot foods counter, an a la carte café menu, as well as their tremendously popular smokehouse and barbecue offerings sold at the store.

Beyond using the Red Goose brand herbs and spices for all of his recipes, Chef Key’s also worked with Red Goose to create a proprietary seasoning flour for his fried chicken, as well as his rubs for his smokehouse products.

Considering the many ways Red Goose and Savvy Goose can provide solutions to all your kitchen’s seasoning and coating requirements, both are excellent choices to consider as partners in your food service or retail grocery business.

Are Bay Leaves REALLY Necessary?

It comes up as a topic in kitchens all the time.

Are Bay Leaves REALLY necessary? Or are they just a time-honored tradition?

Do we stock them on our shelves, then put them in our recipes because they truly add a valuable flavor? Or, because the recipe says to.

Are they worth the effort? The cost? Do they make a difference at all?

Would anyone really notice if they weren’t there?

To that point, there are Chefs who would argue that adding Bay Leaves to most (if not all) recipes is like putting flowers on a grave.

They don’t do much for the deceased, but it makes you feel good that you did it anyway.

Is that true? Or, are they turning a blind eye, (or palate), to the fact that Bay Leaves are a legitimate, “go to” seasoning herb?

Granted, Bay Leaves, added to a recipe, aren’t going to bludgeon your palate, like say for instance, oregano or rosemary can.

Generally speaking, Bay Leaves DO add a subtle, but ever so noticeable background nuance, when added in the correct proportion to the remaining seasonings and ingredients in your recipes.

It might be likened to adding vanilla extract to a chocolate recipe. You only “seem” to taste the chocolate, but the vanilla is there lurking just below your taste perception of it, melding into the homogenous whole and rounding out the flavor.

You couldn’t admit to actually tasting the vanilla but you might likely notice its absence if it was omitted.

The chocolate wouldn’t quite taste the same.

Much is the same for Bay Leaves, especially when added to a medley of other more prominent herbs and spices in a recipe.

Could it be that the lack of their flavor contribution is more a factor of the lack of adding the necessary amount to be noticed.

What are Bay Leaves and how are they used?

Bay Leaves come from the Bay Laurel plant, which is classified as an evergreen and grow in warmer climates.

DRIED BAY LEAVES

They can be purchased and used fresh, dried, whole or ground. You can also purchase fresh leaves and dry them yourself, which typically takes about 4 weeks. From there, it’s best to store your newly dried leaves in a zip lock bag away from light and excessive heat.

FRESH BAY LEAVES

Most recipes which use Bay Leaves are for stocks, soups, sauces and stews. All of which are generally slow cooked which bring out the herbaceous aromas and flavors in Bay Leaves, that most would compare to oregano and thyme with just a hint of mint and spice.

From a use perspective, Bay Leaves should be added at the beginning of the recipe to allow the maximum amount of time for the leaves to release their flavors into the liquid. Much like making tea.

Unlike many herbs and spices which are actually consumed while enjoying the dish, whole bay leaves are removed from the finished recipes and discarded, leaving behind their contribution of savory goodness melded into the liquids.

Factoids:

  • Worn as a woven leaf “crown” to signify honor and success by Emperors, Olympian athletes, poets and scholars, laurel, the name of the plant, worked its way into our everyday vocabulary.
  • Upon successful completion of a 4-year college degree, you earn a baccalaureate, which translated, is: “berries of laurel,”
  • And the supreme honor of Poet Laureate, to someone who composes poems for special occasions.

There are 2 distinctive types of Bay Leaves.

  1. California (Which are mostly sold fresh and which are more potent). If using fresh Bay Leaves, use about half the amount the recipe calls for.
  2. Mediterranean (Which are sold as dry whole leaves or ground). These are the “standard” Bay Leaves in almost every kitchen.

Other popular varieties of Mediterranean Bay Leaves come  from West India, Indonesia and Mexico.

The current inventory of Bay Leaves at The Red Goose Spice company is a marvelously aromatic one sourced from India.

So, what conclusions can be drawn?

Bay Leaves, when still volatile, used in recipes correctly, and in their recommended amount, certainly add a distinctive flavor and aroma that only Bay Leaves can offer.

The key, is volatility as many kitchens use this herb so infrequently that it has lost much of its potency when called upon.

The Red Goose Spice Company recommends that you to buy Bay Leaves in whatever quantity necessary to use your inventory within 12 months of purchase to maintain their unique flavors and maximize their herbaceous contributions to your favorite dishes.

They’ll do a lot for your recipes make you feel good at the same time.

How Herbs de Provence Came To Be

Herbs and spices are simply amazing. Each one of them has a history and a story all their own.

Singularly, historians can trace back the origins and uses of nearly each and every herb or spice we use today, going back thousands of years

Commercially produced herb and spices blends however, are a much more recent thing. Often, the bi-product of convenience. Curry Powder is a good example.  (See Red Goose Blog: Curry in a Hurry)

From ancient times, until a few centuries ago, you pretty much had to buy each and every individual herb or spice you used in your dishes. There were no “blends”.  When it came to making a recipe with multiple herbs and spices, you pulled them all out of your pantry, added each one to your dish or ground them together in a mortar and pestle in whatever proportion you desired.

No Chili Powder, no Curry Powder, no “Italian” Herbs Blend, no Herbs de Provence.

Even if you love to cook, there are a couple of down-sides to making your own blends.

Besides needing to have all the individual components available (and fresh), each and every time you make a blend, there is the likely lack of consistency of flavor every time you make it.

As a result, herb and spice blends are, generally speaking, a very good thing. And each has a history all their own.

Take Herbs de Provence for example, one of the more unusual herb and spice blends.

Everyone loves a good story. This one however, doesn’t date back to ancient times.

Its name and the popularity of Herbs de Provence isn’t attributed to some famous French Chef, but rather to a popular American Celebrity Chef, who lived in France for a time and wrote one of the most widely known, and used, cookbooks on the planet.

Julia Child and her best-selling, Mastering the Art of French Cooking, first published in 1961.

This wildly successful book, considered by many to be one of the most influential cookbooks ever published, included a sauteed chicken dish using an herb and spice blend she named: “Poulet Sauté aux Herbes de Provence”.

The rest, as they say, is culinary history.

The usual suspects (plus one)

Before blends, and before Herbs de Provence had an “official” name, those who enjoy preparing the regional cuisine of Southern French needed to have these classic herbs and spices always at the ready, most of which, happen to be cultivated in Southern France. They are: Oregano, Thyme, Savory, Rosemary, and perhaps some Fennel, Tarragon, Bay Leaf, or Chervil if you are making one of the more unique blends.

There wasn’t, (and still isn’t), a “true” recipe for the exact  proportions of each ingredient in Herbs de Provence however the earliest “recipe”, believed to be its ancestor, used nearly equal parts of just 4 herbs. Oregano, Thyme, Rosemary and Savory.

So, you just started there.

This blend, you might notice, lacked the one spice that everyone now identifies it by, and that is, lavender, which Southern France’s is famous for, and which both the locals, and tourists, love.

Lavender

It started to appear in later adaptations of Herbs de Provence and then became quite popular, especially in America.

Lavender gives Herbs de Provence its uniquely perfumed aroma, it’s alluring taste and adds a hint of French romance to what otherwise would be a blend which could just as easily be perceived as Italian.

A dish using Herbs de Provence is unmistakable in any recipe it is used in.

However, as the Herbs de Provence blend became more popular, even those in a professional kitchen, had to keep ALL of these individual herbs and spices in their pantry AND fresh, and then measure them precisely each time to obtain a consistent result. Oh, and by the way, lavender seeds aren’t exactly cheap, so unless you’re making this blend a lot, why would you want to have lavender seeds in your pantry?

Kind of a pain.

As expected, it didn’t take long for the purveyors of herbs and spices to seize the opportunity to provide various versions of an Herbs de Provence blend to both the retail and commercial markets.

So, just how is Herbs de Provence used?

Herbs de Provence is extremely versatile. It pairs well with chicken, pork, lamb, fish, vegetables, on salads, salad dressings, even omelets!

Recipes using Herbs de Provence include cooking methods such as sauteing, braising, grilling and roasting. It can be uses as a rub before cooking, added to a liquid or sauce during cooking or even as a topping to a salad or pizza.

Classically, beyond proteins, it pairs well with tomatoes, olives and olive oils, cheeses, root vegetables and many Mediterranean dishes which its why you’ll often see it used in Ratatouille, Tapenades and rustic vegetable stews. You’ll also find it gives off a remarkably fragrant smoke if you moisten it and sprinkle it over coals while grilling.

Whether you currently use Herbs de Provence in your cuisine or, you’d like to explore the amazing versatility of this amazing blend enjoyed by so many foodies on BOTH side of the “pond”, The Red Goose Spice Company has a marvelous version available for immediate delivery to your kitchens.

As Julia Child would say as she ended each and every one of her TV shows…”Bon Appetite!”


Curry in a Hurry. How Curry Powder Came to America

Here in the States, when most of think of curry, we immediately think of a “golden colored powder”, and a few curry dishes that we may have tried, or enjoyed.

Nothing too complicated.

Maybe a Curried Lamb, or perhaps, a Curried Thai or Indian dish at favorite restaurant in town.

But there are a few misconceptions about the curry powder that you’ve come to know all of these years, and we thought we’d clear up a few of them here.

Curry 101, so to speak.

And “psssst”, don’t feel bad if you learn something new here, there are professional chef’s out there who, if they were honest, would have to admit that they don’t know much about curry’s interesting past either.

Let’s start from the beginning.

The Curry Tree is native to the Indian subcontinent and its leaves are used in many Indian and Asian dishes.

However, curry leaves, are not in curry powder.

Surprised?

Actually, curry powder is a blend of herbs and spices all its own. In fact, curry powder is kind of a “short cut” creation, replicating the spices most “commonly” used to make the traditional yellow curry from scratch as it was done in India for centuries. The yellow color coming primarily from the spice, turmeric.

And curry dishes aren’t exactly a new thing in America.

In fact, while curry dishes themselves originated in India and Southeast Asia, curry powder actually made its way to America via…. Wait for it…

Britain.

The Story…

The story goes that after the British arrived on our shores, (well before the battle for our own independence) so too did the East Indians, and with them, their passion for curry dishes.

By that time, even the East Indians living in Britain were reluctantly beginning to use a convenient, pre-blend form of curry powder made in India. Mainly due to the difficulty of finding the many different spices in the British markets that were needed to make their traditional curry blends.

Interestingly, by all accounts, the Indians back in India didn’t care much for this new powder that they were making for the Brits, choosing instead, to continue grinding it together from scratch with a mortar and pestle. Giving them the freedom to continue making their time honored, individual curry recipes from the spices that they had no trouble finding in their markets.

But they made this curry powder for the Brits anyway, and sent it along to them. In turn, that same powder came over on the ships from Britain to us here in the States (along with a bunch of men in fancy red coats with silver buttons interested in making it their permanent home.)

What was sacrificed in the process however, was the many different expressions of curry flavors treasured by cooks and enjoyed by so many in back in India.

They were mostly lost the western world for some time.

The “dumbing down” of curry by the creation of this one size fits all, “short cut” powder, became quite a sore subject back in its homeland, India.

So, in summary:

  1. Curry powder doesn’t use curry leaves, which are actually green. Curry leaves are however, used in some Indian cooking recipes. They are, when dried and ground, the color of…mmmm? Ground sage?
  2. Curry leaves don’t taste anything like curry powder.
  3. Curry powder is a blend of spices, not a single one.
  4. The curry powder we know it, is a “shortcut” form which didn’t come from India or in Indonesia by choice but rather for convenience.

So, now know a little something about the “blend” called Curry Powder. The yellow one.

But the word “curry” also became, over time, a phrase used to as much to denote a cooking style, as the flavor we associate it with. Much the way we use the term “barbecue” here in America.

For example, it’s often said, particularly in our Southern states, “we’re having barbecue tonight”, which doesn’t tell you what meat, or “exactly” how it may be cooked (although you can basically assume slowly and smoked), or even how it is seasoned.

You do however, generally know what you’re getting and generally the range of tastes.

Similarly, “we’re having curry” doesn’t divulge the meat, (but you can generally assume it’s braised or stewed), or for matter, exactly what type of curry it might be?

In essence, from a cooking style perspective, this is one cooking style…

This, is another…

So, beyond the “yellow” curry most people are familiar with, what are the other types of curries out there?

First, it’s important to mention that there are dozens upon dozens of different flavored yellow curry powders out there depending on the blends. And some curries are red in color, due to the addition of red chilis and some are even green.

All look and taste uniquely their own. But they are all curry blends.

The answer to the question it’s probably thousands. Especially if you also take into consideration the word ‘curry” as both the flavor AND a category of cooking method.

If this were a math problem, it would look something like this…

Cultural taste preferences, (Indian, Thai, African, Asian, British and so on), X the spice choices used, X ratios of each spice to one another, X Scoville (heat index) of chilis used (if any), X meats and other proteins used, X the cooking method employed.

In other words, thousands.

As such, curry has become globally popular and a welcome addition to menus of all types.

Of course, The Red Goose Spice Company not only has a fabulous yellow curry powder in stock, but we can also custom blend any recipe you have or that you might wish to create for your business or retail sales.

Contact us today to discuss how we can help you bring the ancient and historical flavor of curry to your customers.