Category Archives: Festivals

Make Your OWN Prepared Mustard!

Prepared mustard.

It’s in nearly every fridge or pantry in the modern world and used in, or on, thousands of dishes ranging from the classic and iconic, to today’s contemporary recipes.

The list is simply exhausting!

Salad dressings, sauces, deviled eggs, potato salad, beef, lamb, pork, seafood, and of course, on our beloved hot dogs.

Yet as ubiquitous as prepared mustard around the world, it’s a recipe rarely made in our homes, or, in professional kitchens?

Why is that?

Because it’s beyond simple to make.

Mustard surely gets enough love otherwise. In fact, there are numerous festivals all around the world extolling mustard’s culinary virtues.

From Napa Valley, California to Berlin, Germany, mustard festivals are held each year and feature famous dozens of contests.

Famous Chefs at these events offer demonstrations, and there are numerous opportunities to feast on fabulous dishes using mustard in every imaginable way.

How is prepared mustard made?
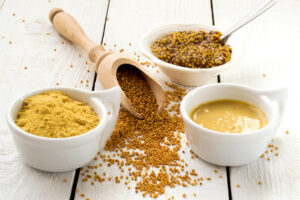
Let’s look at how a prepared mustard recipe is made. Maybe, along the way, you’ll discover that it’s something you’d really enjoy making in your kitchen.

“House” prepared mustard is a pretty impressive (and very simple) way to add a distinctive and artisanal flair to your menus.

The basic ingredients needed to make mustard can be as simple as mustard and a liquid. The method however, can done in one of 2 ways.

  • Soak the whole seeds in the liquid, then blend or grind the mustard seeds into a paste. Or,
  • Grind the seeds to the desired fineness BEFORE adding your liquids. The additional grinding afterwards isn’t necessary.

Chemistry in action.

There’s a lot of chemical stuff going on when you make mustard.

The “heat, or bite” that comes from prepared mustard is within the seeds, and then it reacts with the liquids. So, breaking the seeds open is a part of the process.

It’s already been done for you with powdered mustard but it’s something you must do if you’re also using whole seeds.

Spicy or mild?

Temperature “heat”, (even hot water) negates much of the chemical reaction that give you the “spicey heat” component in prepared mustards.

If you want a mustard with more of a “bite” you should use cold water.

Warm water also works, but gives you more of a “mild” mustard reaction and flavor.

Using water alone, generally only gives you a few days (or less) of great mustard flavor. This can, (and should) be “stabilized”, by adding an acid (such as vinegar, lemon juice or horseradish) and some salt.

It also gives you that traditional taste, that most people love and accept.

Which seeds?

Three seeds used to make mustards, they are: white, brown and black.

The white mustard plant, actually makes the mustard seeds that we call yellow, and they make a very pale-yellow powder, not the bright yellow you see in the bottle. They also make a rather mild mustard while, brown and black mustard, are a bit more “robust” in flavor.

The yellow “salad” mustard you see in your grocery store is typically made with the yellow seeds from the white mustard plant with turmeric spice added for color.

The ingredient statement on a bottle of Heinz mustard reads: DISTILLED WHITE VINEGAR, MUSTARD SEED, WATER, SALT, TURMERIC, NATURAL FLAVOR AND SPICES.

Brown mustard seeds are found in many premium prepared mustards including the popular Grey Poupon brand.

Black mustard seeds (called rai) are the most pungent and the least common seed to be found in American mustards but they are popular in Southern Indian cuisines.

Many people who enjoy making prepared mustards for their kitchen prefer to use at least 2 mustard seed varieties to create a more “complex” flavor.

A common combination is a hand or machine ground, brown seed, with a white (or yellow mustard powder added as a base).
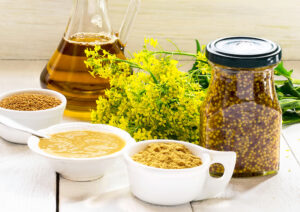
Making your prepared mustard.

Since making a prepared mustard is rather easy, try making a batch using this recipe. We think you’ll agree that adding your own house-made mustard to your culinary repertoire might just plant the “seed” for many great recipe ideas.

We’ll use method number 2 with brown mustard seeds and yellow mustard powder.

Simple Prepared Mustard

Makes about 2 cups

½  cup brown mustard seeds

1  cup ground yellow mustard powder

1 tablespoon salt

2 tsp ground turmeric (optional)

2 tablespoons honey or brown sugar (optional)

1  cup cold water

¼ Cup + 1 tablespoon apple cider or white wine vinegar

  1. Grind the whole mustard seeds for a few seconds in a spice grinder, or by hand with a mortar and pestle. Leave the seeds only coarsely ground to give the final prepared mustard some whole seed identity.
  2. Add the ground seeds into a non-reactive (Stainless steel or glass) mixing bowl and add the salt and mustard powder. If you choose to add the turmeric and sweetener, add that as well.
  3. Pour in the water, then mix together well. When everything is incorporated, let this rest for at least 15 minutes, then add the vinegar.
  4. Pour into a glass or plastic container and store in the fridge.
  5. Your mustard will initially seem thin, but fear not, as the liquids are absorbed by the mustard, it will thicken up in a day’s time.

Perhaps the hardest part of this recipe is waiting for the mustard to fully mature, which takes at least 2 days.

You’ll be tempted to taste it right away, even the next day, but fair warning, you’ll likely be disappointed because it will taste a bit bitter as the vinegar will just be beginning its to do its transformational “mellowing”.

Having said that, if it’s your first go at it, give it a try right away, and then a few days later. You’ll definitely notice the difference!

Once you’ve made your first batch, you may want to make some tweaks to suit your own personal tastes, or to fit a particular menu item you’ve created.

Among the things you can “experiment with” are:
  • Changing the mustard seeds to powder ratio.
  • Using beer or white wine as all or part of the water
  • Changing the sweetener
  • Adding some “heat”…chopped chiles or horseradish.
  • Adding chopped herbs (tarragon is a very popular option)

Your finished mustard, if stored properly under refrigeration, can last up to a year. Even longer if you process it as you would any canning technique.

Of course, you’ll want to use a great source for your mustard seeds which is why so many Chefs buy their mustard seeds from the Red Goose Spice Company.

If your goal is to eventually make larger batches of mustard, we sell our mustard seeds in any size quantity that suits your seed needs.Prepared 

Are America’s Favorite Mexican Foods Really Mexican?

Taco Bell, Qdoba, Chipotle’s, On the Border, Moe’s and all the independents…

One thing is quite obvious.

Aside from pizza, Mexican / Southwest / Tex-Mex / Hispanic foods favorites are THEmost home-delivered meals, coast to coast.

Ask any Uber Eats or Door Dasher.

American’s just LOVE Mexican cuisine.

Or, is it really Mexican?

And, did we really think it was?

Does it really matter?

French Fries aren’t French, (they’re from Belgium), and the list of foods that don’tactually come from the countries that we think they come from, is a mile long (or a kilometer).

As we approach this year’s Cinco de Mayo, many America’s choose to celebrate the occasion by enjoying one of their favorite “Mexican” foods.

Ironically, even our understanding of the Cinco de Mayo celebration is a bit misplaced.

Cinco de Mayo, or the fifth of May, is actually a relatively minor holiday in Mexico.

It isn’t Mexico’s celebration of its independence from Spain, but rather the Mexican army’s May 5, 1862 victory over France at the Battle of Puebla during the Franco-Mexican War.

Mexico’s actually Independence Day, September 16th, is known as, 16 de Septiembre, which doesn’t have quite the same ring now does it?

Getting back to the food we associate with Mexico, while most of our favorites have their roots in Mexico, it probably comes as no surprise that American’s adapted much of Mexico’s “cultural cuisine” to suit our own tastes.

Many of these recipes came from Mexican’s themselves who immigrated to the U.S. southern states and cooked versions of their ancestral dishes with locally available ingredients.

All the while, adapting to the local tastes.

In some cases, it was the spices, the wraps (tortillas de harina), the combination of ingredients, or the maybe cooking methods.

Like the “original” pizzas from Naples, Italy, or the pasta that we also borrowed from Italy, (that in turn Italy borrowed from China centuries before), things evolve so fast in the food world that while we might give homage to its origins, we might not even recognize it.

Even if it could be delivered across centuries of time to eventually arrive at our front door, via door dash.

But for this exercise, let’s look at those iconic dishes that you’d be hard pressed to find in Mexico in the version that we enjoy them here in the states.

Here, they’re called Tex-Mex.

Before we begin down that trail, it’s understood that nearly anyplace in Mexico where there are American tourists, you’ll likely find hotels, resorts and restaurants who are catering to Americans who want American “style” Mexican cuisine.

Some tourists, never even leave their all-inclusives.

So sorry, Cancun may not actually count, unless you get off the island and into Ciudad de Cancun, the city, or, if you’re lucky enough to have a truly authentic Mexican Chef on your property.

Having said this, here are some examples of our American / Mexican favorites.

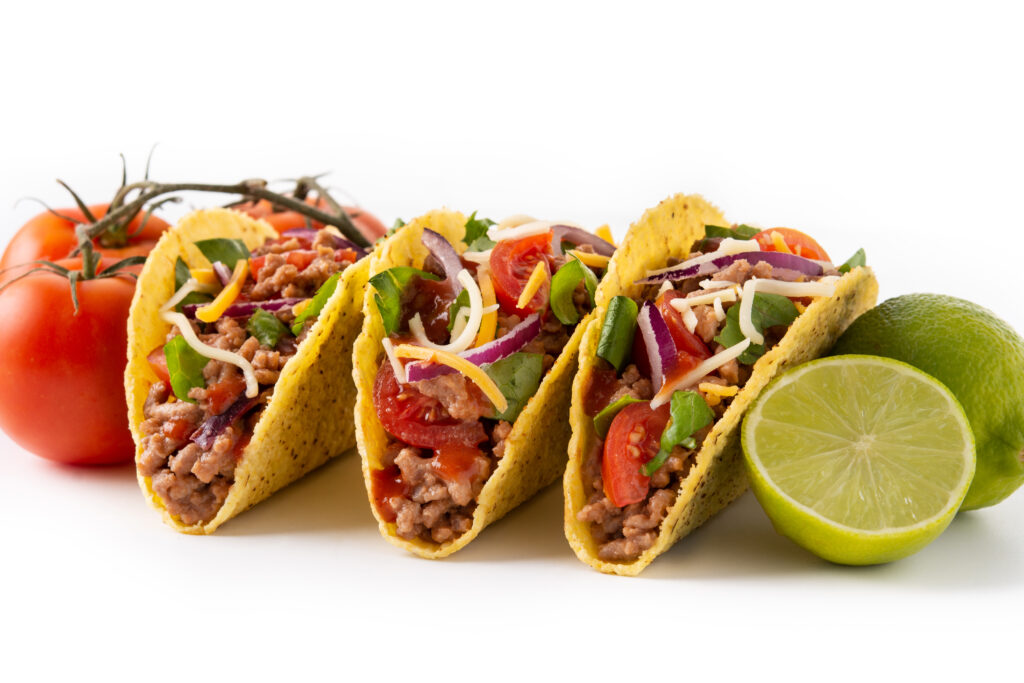
Hard Shell Tacos… You will find the smaller, soft flour tortillas or hand-made corn ones in Mexico, usually with braised meats, shredded cabbage, tomatoes and salsa but not the hard ones like we have in the states with ground beef. And generally, not the same fillings either. Most native Mexicans can’t understand our affection for these crunchy, hard to eat shells.

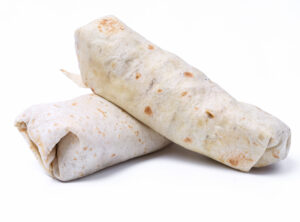
Burritos…The Burrito you enjoy for $5.99 is a completely an American invention. We like things super-sized with lots of wrap, not so much filling. We got it with Burritos. You can find a Burrito of sorts, in Mexico. You may not recognize it however.

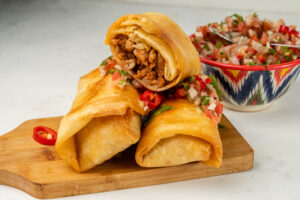
Chimichangas… Well, if Burritos are an American food invention, where do you think a deep-fried Burrito fits in to this equation. Yep, it’s believed to have its origins in Arizona.

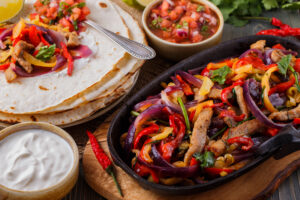
Fajitas…The quintessential Tex-Mex contribution to our food world. The sights, sounds, smells and unmistakable taste of seared or charred beef skirt steak on a hot oval skillet is 100% delicious and 100% American.

Loaded Nachos… You’ll certainly find fried corn tortilla chips tomato salsa, guacamole and the white, queso fondido cheese dip in Mexico.

What you won’t find in an authentic Mexican restaurant is a platter of chips buried under an avalanche of seasoned ground beef, yellow cheese sauce (Velveeta or otherwise), and all the toppings we typically associate with this American bar-food favorite.

Chili con Carne… One of the first Tex-Mex foods to originate “North of the Border”. It’s introduction of cumin, which was not typically used in Mexican cuisine, combined with ground beef, tomatoes and chilis made this iconic dish truly different.

Historically, similar dishes were made in the Canary Islands and Morocco so this wasn’t a completely “off the wall” invention.

In fact, it became so popular in Texas that it was known locally as a “bowl of red”. It was even the featured dish at the Chicago World’s Fair of 1893 at the San Antonio Chili Stand and then eventually made the official state food of Texas in 1977.

Want to learn more about Chili? Check out a recent Red Goose Blog on White Bean and Chicken Chili and another one of our Blogs on the difference between Light and Dark Chili Powders.


With Cinco de Mayo right around the corner, if you’re looking for a new recipe to add to your Mexican or Tex-Mex repertoire, enjoy our recipe for Chilaquiles Rojos con Pollo.

Chilaquiles is typically a breakfast dish and it can be made with either green chiles (verde) or red (rojos).

It can also be made in a very simple way by tossing corn tortilla chips in sauce and plating with queso fresca and a black bean type stew, or, by making the recipe into more of a baked casserole similar to an enchilada style.

We’ll share with you this modern adaptation that we think you will really enjoy.

Make Your OWN Prepared Mustard!

Prepared mustard.

It’s in nearly every fridge or pantry in the modern world and used in, or on, thousands of dishes ranging from the classic and iconic, to today’s contemporary recipes.

The list is simply exhausting!

Salad dressings, sauces, deviled eggs, potato salad, beef, lamb, pork, seafood, and of course, on our beloved hot dogs.

Yet as ubiquitous as prepared mustard around the world, it’s a recipe rarely made in our homes, or, in professional kitchens?

Why is that?

Because it’s beyond simple to make.

Mustard surely gets enough love otherwise. In fact, there are numerous festivals all around the world extolling mustard’s culinary virtues.

From Napa Valley, California to Berlin, Germany, mustard festivals are held each year and feature famous dozens of contests.

Famous Chefs at these events offer demonstrations, and there are numerous opportunities to feast on fabulous dishes using mustard in every imaginable way.

How is prepared mustard made?

Let’s look at how a prepared mustard recipe is made. Maybe, along the way, you’ll discover that it’s something you’d really enjoy making in your kitchen.

“House” prepared mustard is a pretty impressive (and very simple) way to add a distinctive and artisanal flair to your menus.

The basic ingredients needed to make mustard can be as simple as mustard and a liquid. The method however, can done in one of 2 ways.

  • Soak the whole seeds in the liquid, then blend or grind the mustard seeds into a paste. Or,
  • Grind the seeds to the desired fineness BEFORE adding your liquids. The additional grinding afterwards isn’t necessary.

Chemistry in action.

There’s a lot of chemical stuff going on when you make mustard.

The “heat, or bite” that comes from prepared mustard is within the seeds, and then it reacts with the liquids. So, breaking the seeds open is a part of the process.

It’s already been done for you with powdered mustard but it’s something you must do if you’re also using whole seeds.

Spicy or mild?

Temperature “heat”, (even hot water) negates much of the chemical reaction that give you the “spicey heat” component in prepared mustards.

If you want a mustard with more of a “bite” you should use cold water.

Warm water also works, but gives you more of a “mild” mustard reaction and flavor.

Using water alone, generally only gives you a few days (or less) of great mustard flavor. This can, (and should) be “stabilized”, by adding an acid (such as vinegar, lemon juice or horseradish) and some salt.

It also gives you that traditional taste, that most people love and accept.

Which seeds?

Three seeds used to make mustards, they are: white, brown and black.

The white mustard plant, actually makes the mustard seeds that we call yellow, and they make a very pale-yellow powder, not the bright yellow you see in the bottle. They also make a rather mild mustard while, brown and black mustard, are a bit more “robust” in flavor.

The yellow “salad” mustard you see in your grocery store is typically made with the yellow seeds from the white mustard plant with turmeric spice added for color.

The ingredient statement on a bottle of Heinz mustard reads: DISTILLED WHITE VINEGAR, MUSTARD SEED, WATER, SALT, TURMERIC, NATURAL FLAVOR AND SPICES.

Brown mustard seeds are found in many premium prepared mustards including the popular Grey Poupon brand.

Black mustard seeds (called rai) are the most pungent and the least common seed to be found in American mustards but they are popular in Southern Indian cuisines.

Many people who enjoy making prepared mustards for their kitchen prefer to use at least 2 mustard seed varieties to create a more “complex” flavor.

A common combination is a hand or machine ground, brown seed, with a white (or yellow mustard powder added as a base).

Making your prepared mustard.

Since making a prepared mustard is rather easy, try making a batch using this recipe. We think you’ll agree that adding your own house-made mustard to your culinary repertoire might just plant the “seed” for many great recipe ideas.

We’ll use method number 2 with brown mustard seeds and yellow mustard powder.

Simple Prepared Mustard

Makes about 2 cups

½  cup brown mustard seeds

1  cup ground yellow mustard powder

1 tablespoon salt

2 tsp ground turmeric (optional)

2 tablespoons honey or brown sugar (optional)

1  cup cold water

¼ Cup + 1 tablespoon apple cider or white wine vinegar

  1. Grind the whole mustard seeds for a few seconds in a spice grinder, or by hand with a mortar and pestle. Leave the seeds only coarsely ground to give the final prepared mustard some whole seed identity.
  2. Add the ground seeds into a non-reactive (Stainless steel or glass) mixing bowl and add the salt and mustard powder. If you choose to add the turmeric and sweetener, add that as well.
  3. Pour in the water, then mix together well. When everything is incorporated, let this rest for at least 15 minutes, then add the vinegar.
  4. Pour into a glass or plastic container and store in the fridge.
  5. Your mustard will initially seem thin, but fear not, as the liquids are absorbed by the mustard, it will thicken up in a day’s time.

Perhaps the hardest part of this recipe is waiting for the mustard to fully mature, which takes at least 2 days.

You’ll be tempted to taste it right away, even the next day, but fair warning, you’ll likely be disappointed because it will taste a bit bitter as the vinegar will just be beginning its to do its transformational “mellowing”.

Having said that, if it’s your first go at it, give it a try right away, and then a few days later. You’ll definitely notice the difference!

Once you’ve made your first batch, you may want to make some tweaks to suit your own personal tastes, or to fit a particular menu item you’ve created.

Among the things you can “experiment with” are:
  • Changing the mustard seeds to powder ratio.
  • Using beer or white wine as all or part of the water
  • Changing the sweetener
  • Adding some “heat”…chopped chiles or horseradish.
  • Adding chopped herbs (tarragon is a very popular option)

Your finished mustard, if stored properly under refrigeration, can last up to a year. Even longer if you process it as you would any canning technique.

Of course, you’ll want to use a great source for your mustard seeds which is why so many Chefs buy their mustard seeds from the Red Goose Spice Company.

If your goal is to eventually make larger batches of mustard, we sell our mustard seeds in any size quantity that suits your seed needs.Prepared 
White Bean Chicken Chili

For nearly everyone, when you think of chili, you think of a mahogany red colored stew of beef (and perhaps beans), with both savory and sweet spices.

It can be delicately spiced and very approachable, or it just might burn the leather off the soles of your shoes…, just because.

Whether mild or blistering hot, almost everyone agrees, it’s all about the beef, the tomatoes and the spices.

Chicken? Wait a minute…did you just say chicken?

If orange, is the new black.

Chicken (or turkey), is the new beef.

At least when it comes to chili.

How and when chicken chili came about is certainly a guess but it those extolling the virtues of poultry as a substitute for red meat certainly pushed its popularity to an all-time high in the past decade.

Most everyone agrees that our modern-day Chili Con Carne,  is an American adaptation of a similar Mexican, Canary Island or Moroccan dishes going back hundreds of years.

Being the melting pot that it is, Texans, more specifically San Antonians gradually assimilated these multiple culinary influences within what was their simple peasant style stew of hashed beef and peppers and, over time, turned a local stew, into a nationally renowned, destination worthy dish.

Known locally as a “bowl of red”, it was even the featured dish at the Chicago World’s Fair of 1893 at the San Antonio Chili Stand and then eventually made the official state food of Texas in 1977.

Beans.

If you think the subject of using chicken instead of red meat in chili might be sacrilegious to the chili purists, just bring up the subject of beans.

It’s not a matter of which beans or what proportion to meat, it’s a matter of no beans.

No, no, no and #@!*%#! no.

Chili today.

Purists aside, the real “power” behind chili is The International Chili Society, (ICS) which holds the World Championship Chili Cook-off.

It was formed in 1967 and divides the chili competitions into the following categories:

  • Traditional Red
  • Chili Verde
  • Homestyle Chili
  • Veggie Chili

And you might be interested to know that not only does the Homestyle Chili allow the use of ANY meat (you go CHICKEN!) but the recipes MUST have beans in them!

And, well, that’s a good thing because the International Chili Society’s World Cook-Off’s presenting sponsor, is none other than….

Wait for it…..

Bush’s Best beans….

If you’d like more information about the International Chili Society or any of its upcoming competitions, hit the following link with your wooden spoon…

https://chilicookoff.com/

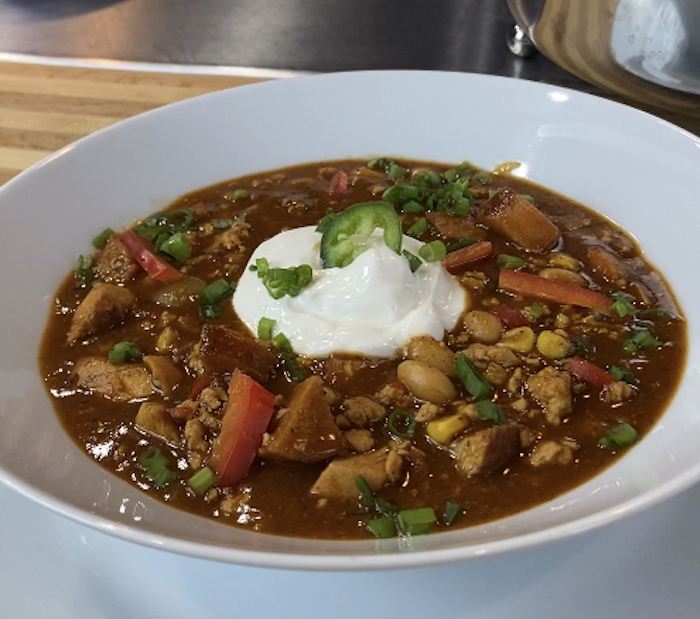
And, as promised, here is the Red Goose recipe for our delicious White Bean Chicken Chili

Makes about 3 quarts.

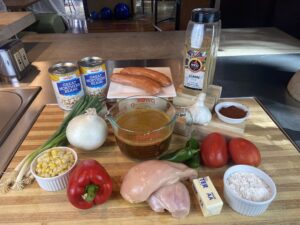
12 oz  boneless, skinless chicken breasts

2 links  chicken Italian sausage

½ stick butter

1/3 cup all-purpose flour

1 tablespoon vegetable oil

1 tablespoon minced garlic

1 tablespoon minced jalapeno

½ cup  chopped white onion

1 pound  ground chicken meat

½ cup  diced red bell pepper

¼ cup  chopped green onion

¾ cup  diced (seeded) Roma tomato

½ cup   cut corn

2 cups  Northern beans, drained

3 cups  strong chicken stock

2 tablespoons ground cumin

¼ cup  dark chili powder

to taste  ground black pepper and salt

Optional garnish: sour cream, green onions, red bell pepper and fresh jalapeno

  1. Begin my grilling both the 12 ounces of chicken breast and 2 links of chicken Italian sausage, then finish cooking them to 165 F in a 350 F oven. Cool and dice into ½” pieces.
  2. In a small saucepan, cook together the butter and flour over medium heat 3 to 5 minutes, making a roux. Remove from the heat and allow to cool for later use.
  3. In a medium-large sauce pot, sauté the onions, garlic and jalapeno with vegetable oil, over medium heat for 2 to 3 minutes.
  4. Add the ground chicken and cook until opaque and fully done.
  5. Add the red bell pepper, green onions and Roma tomato, cut corn, Northern beans, diced grilled chicken and cut chicken Italian sausage. Stir over medium heat for 5 minutes.
  6. Add the chicken stock and the roux and stir together well until it reaches a simmer. Simmer 5 to 10 minutes.
  7. Add the cumin, chili powder, ground pepper and salt to taste. Simmer slowly an additional 20 minutes.
  8. Serve with sour cream, green onions, slivers of red bell pepper and a thin slice of fresh jalapeno.

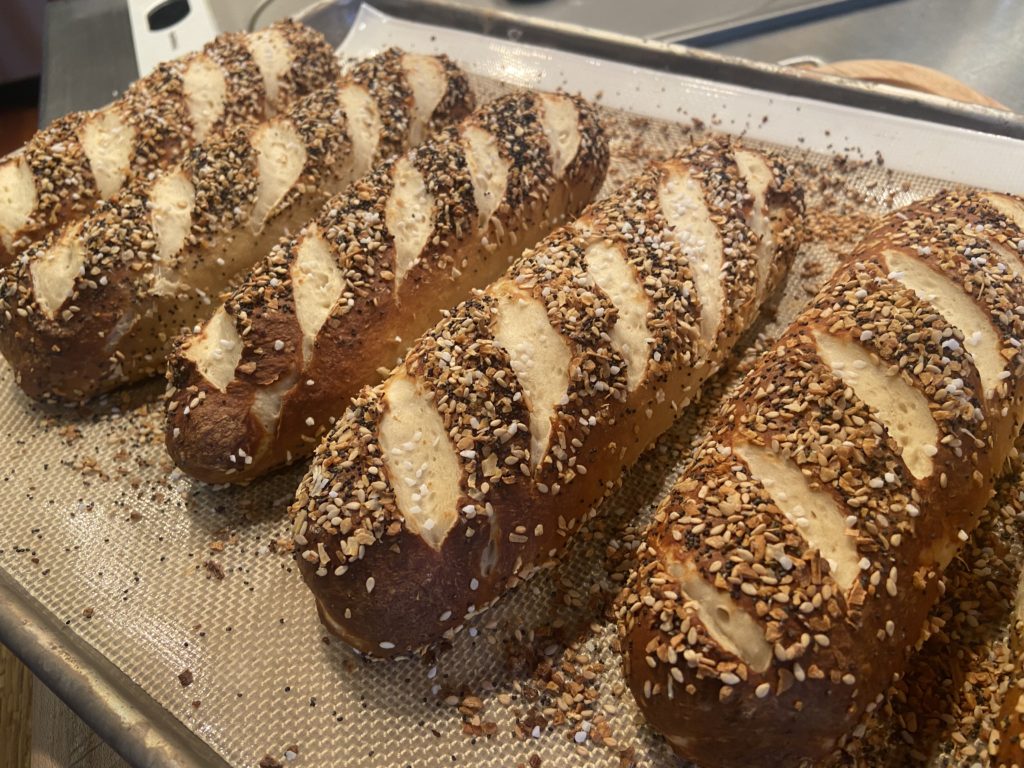
Oktoberfest Soft Pretzels with Everything Topping

Long since known for its blast on bagels, Red Goose Everything seasoning is a fabulous topping on Soft Pretzels!

Enjoy these delicious pretzels with mustard or just warm, fresh out of the oven, all on their own.

Red Goose Oktoberfest Soft Pretzels with Everything Topping 

Makes 6 – 5 ounce Pretzel Sticks

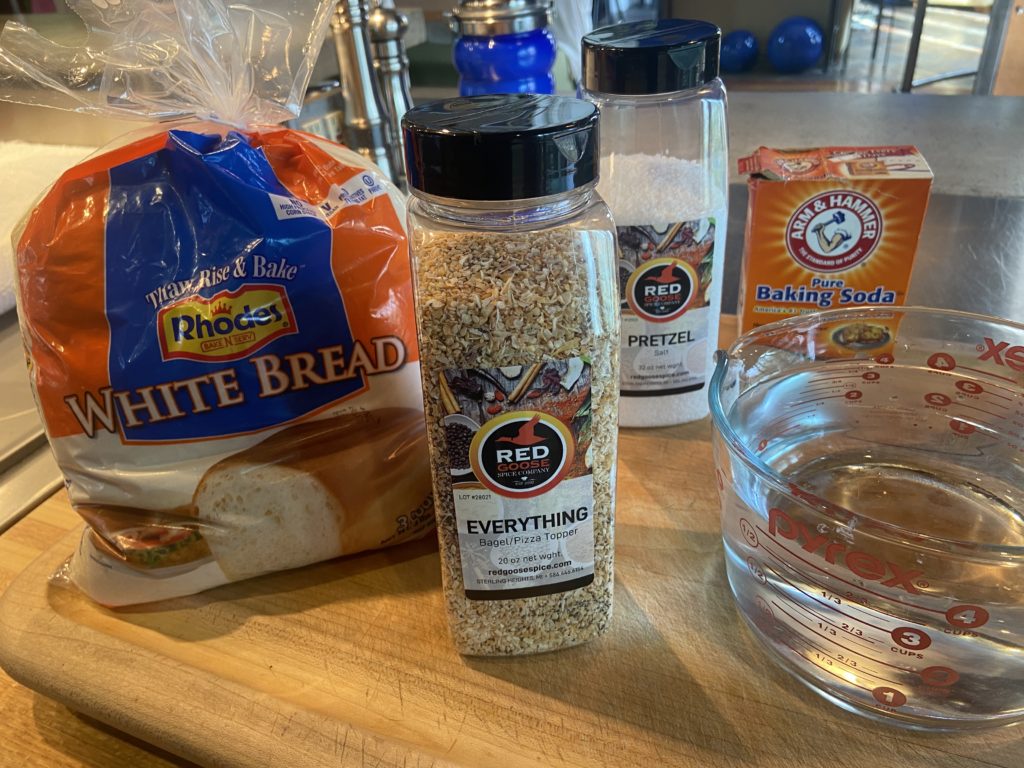
2 lbs.                 Frozen Bread or Pizza Dough (Any Brand)

3/4 Cup             Baking Soda

2 Qts.                Water

½ Cup               Red Goose Everything Seasoning

  1. Preheat oven to 375 degrees F.
  2. Thaw frozen bread dough in the refrigerator overnight or until completely soft and pliable.
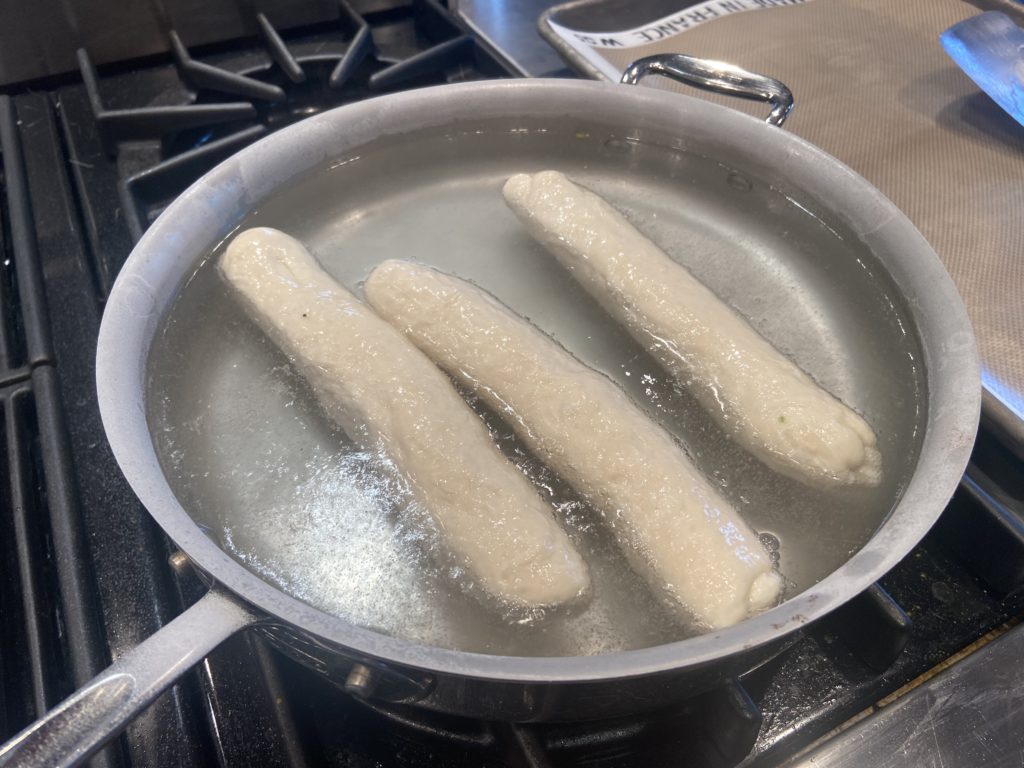
  3. Place the water in a non-reactive saucepan or metal casserole dish of at least 2” of depth and 9” to 10” in diameter then stir in the baking soda until it dissolves. Place the solution over medium low heat until it JUST simmers.
  4. Portion the dough into 6 equal pieces approximately 5 + ounces each.
  5. Roll out each portion of dough into an 8″ long, thick stick. Repeat for the remaining pieces.
  6. Let the sticks rest 5 minutes.
  7. Place the dough sticks in the gently simmering baking water and poach on both sides approximately 2 to 3 minutes rolling over the sticks as they “poach”.
  8. Remove the sticks with a slotted spatula and place on a non-stick baking pan (approximately 2″ apart from one another). You may also want to spray this pan lightly with a non-stick vegetable spray.
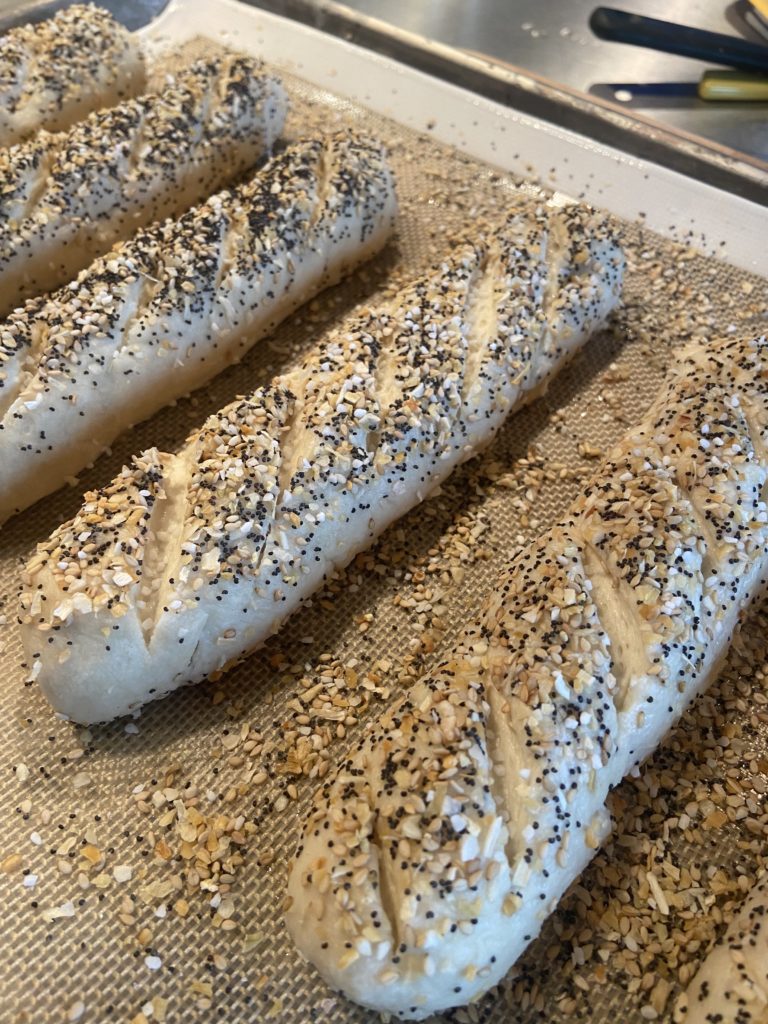
  9. While the dough sticks are still moist and VERY sticky, sprinkle evenly, and heavily, with the EVERYTHING SEASONING so that it will stick to the dough.
  10. Before baking, slash each dough stick with a sharp knife with diagonal cuts approximately 1/4″ deep and 1″ to 2″ apart. Bake for approximately 20 to 30 minutes or until the “Pretzel Loaves” are medium brown and baked through.
  11. Serve plain or with your favorite mustard.