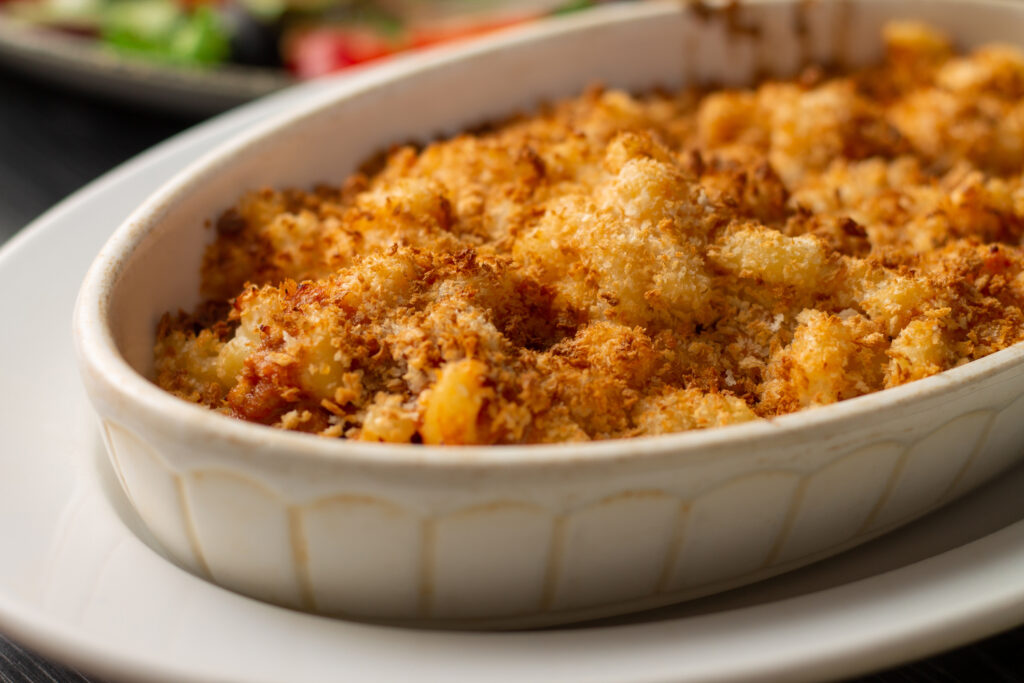
Bread crumbs aren’t just bread crumbs anymore, in fact, bread crumbs offer the Chef many opportunities to add a “gratin of greatness” to your dishes.
Most Chefs think of bread crumbs as either Plain, Italian or “Japanese” Panko. And their uses, as either a filler (crab cakes or meatloaf for instance), a thickener, usually in soups, such as the classic Tuscan soups Ribolitta and Pappa al Pomodoro, and, of course, as a topping or gratin on casserole dishes, roasted vegetables and pasta dishes.
The classis Gremolata is a perfect example of this.
But as far as the flavorings that are added to bread crumbs, beyond an oil or butter, Chefs usually stick to Italian herbs, garlic, grated cheese, pepper and occasionally, lemon zest.
And that’s all fine and good. Those flavors are amazing.
But there are others, and it’s sometimes the road less traveled makes all the difference in your cuisine.
With that thought in mind, we thought we’d explore that road less traveled to give you a glimpse of some of the ways you might consider your bread crumbs, as an opportunity for creative expression.
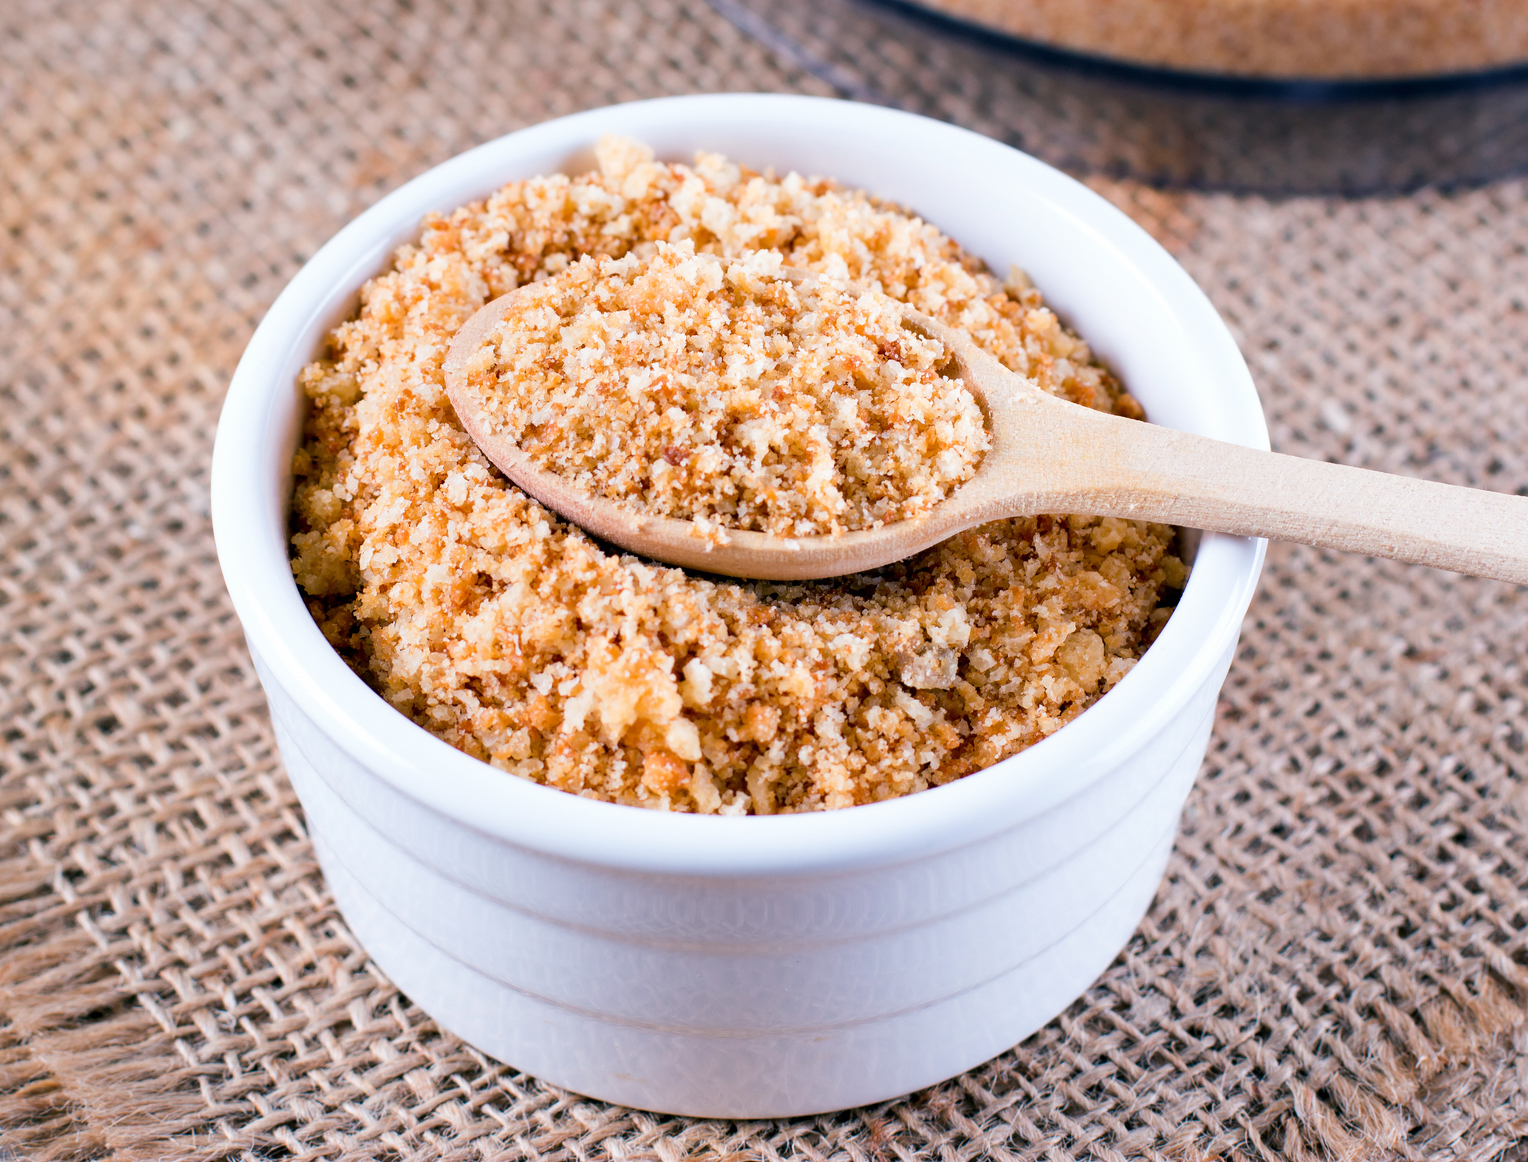
All of the suggestions below can be created using plain bread crumbs or plain panko crumbs.
As far as the exact proportions of bread crumbs to spices or to other ingredients, our suggestions are simply a starting point and should be adjusted you your taste so that they appropriately complement whatever product/s that you may be using them with.
For a baseline, we’ll presume approximately 2 cups of bread crumbs as your base and either clarified butter or an oil of your choice, to moisten your crumbs before adding the following:
¼ cup of Peanut Butter Powder or ½ cup of Ground Pistachio Nuts make an interesting gratin over some Thai or Indian inspired casserole dishes or even a chocolate custard with a gratin.
2 cups Shredded Sweetened Coconut. Is a typical coconut mixture used for Coconut Shrimp in a standard breading procedure.
3 TBSP Anchovy, or ¼ cup Katsuobushi /Dried Bonito Flakes or ½ cup Flaked Smoked (Whitefish). Fish are all an unusual but imaginative gratin over seafood pasta dishes. If using the Bonito, a splash of soy sauce and a drizzle is sesame oil in the bread crumbs is a consideration.
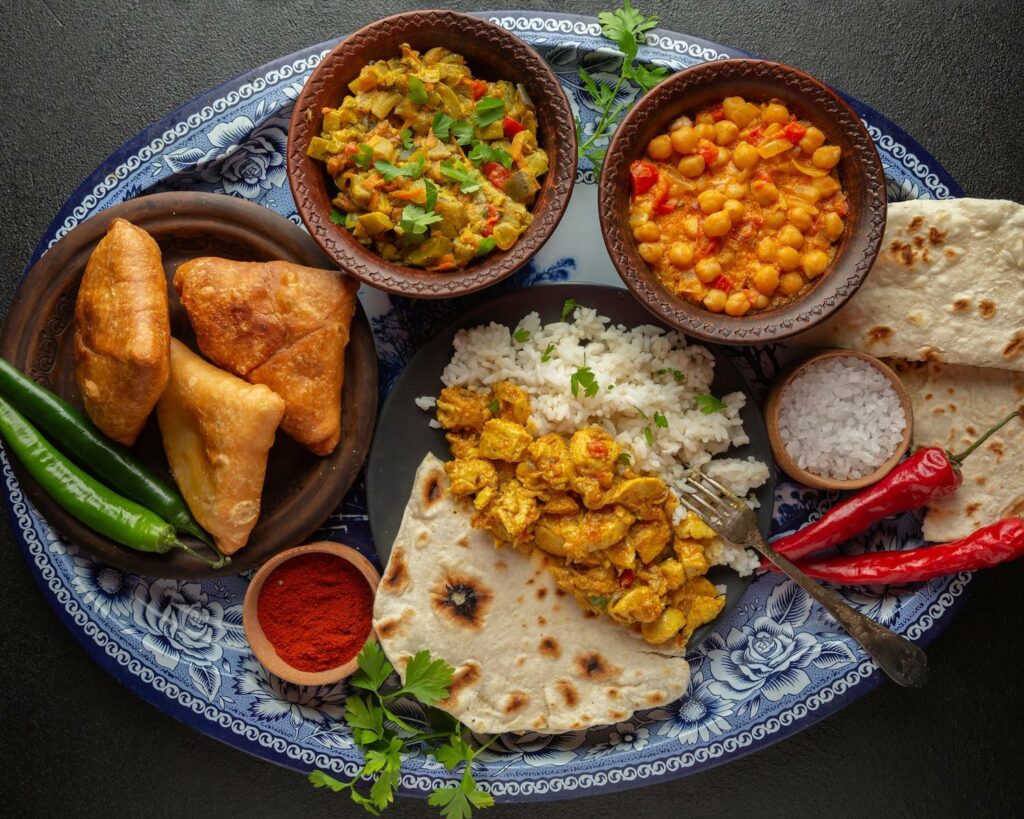
1/3 cup Curry Powder in your bread crumbs can be an excellent topping over everything from pasta dishes to a crust on chicken, lamb, pork, beef…you name it. Also as used in a 3-stage standard breading procedure.
¼ cup Chili Powder with ¼ cup Cumin (and ChipotlePowder or Cayenne as desired for some smoke and heat), creates a wonderful Southwest gratin or coating over so many dishes.
1/3 cup Barbecue Seasoning/Rub added to your bread crumbs can be a unique and delicious gratin over a casserole of pulled chicken, black beans, peppers and onions.
1 tablespoon each of freshly grated Orange, Lemon and Lime Zest can be a show stopping crust on grilled or pan-seared fish and complements them beautifully . A pinch or so of Old Bay Seasoning is also a nice touch. We recommend panko crumbs for this one.
2 tbsp Dark Cocoa with 2 tbsp Light Brown Sugar and 1 tsp of Cinnamon as an alternative topping to a Brule when lightly broiled over a vanilla or caramel custard.
The delightful crunch of a flavored bread crumb topping can be one more tool in the Chef’s culinary tool box to help create memorable dishes.
The Red Goose Spice company has all the herb, spice and flavoring essentials to help you turn your inspiration and imagination, into plated realities.
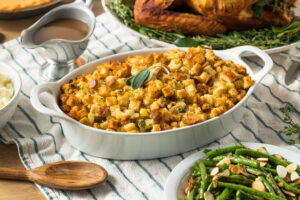
From early fall and all throughout the winter, you’ll find one particular seasoning in high demand as menus tilt more towards roasts, in particular, roasts of the “bird” kind.
And not only the roasts, but in many cases, the stuffing, dressings and other side dishes that often accompany them.
Although Poultry Seasoning isn’t exactly a “seasonal” seasoning, for all intents and purposes, our expectation of what roasted poultry “taste”, just naturally coincides with the savory flavor of this popular blend of herbs and spices.
Especially at Thanksgiving.
Exactly what is Poultry Seasoning anyway?
To begin, it is of course a seasoning blend, and as such, is always open to interpretation as to not only what specific herbs and spices are used, but in what proportion. Much in the same way curry powder, chili powder or Italian seasoning blends are.
If you’re buying a pre-blended Poultry Seasoning, and find one that you particularly like, stick with it, because it’s quite possible that a different brand will not have the exact same blend formula.
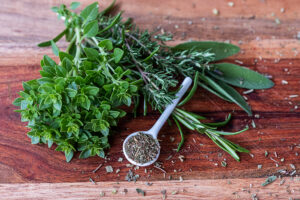
The most common herbs used in this blend are: sage, thyme, marjoram and rosemary. The most common spices being: nutmeg and black pepper.
6 basic ingredients. That’s it.
Among the variations to this blend, are using oregano instead of marjoram, (they’re closely related), and, the use of ginger.
You’ll also occasionally see Poultry Seasoning with the add-ins of onion, garlic, parsley, red bell peppers, celery seed, ground coriander, allspice or savory. But again, it’s not all that common.
Of course, poultry (chicken, turkey, duck, squab, quail etc.), isn’t the only protein whose flavor is graced by this popular seasoning. Pork is another center of the plate meat that is closely associated with Poultry Seasoning, and it’s no coincidence that a bread or corn bread stuffing, seasoned with Poultry Seasoning, is a go-to accompaniment with both.
In addition, gravies and sauces which accompany both poultry and pork dishes are often lightly seasoned with this blend.
Another great use for Poultry Seasoning is as a seasoning in flours and batters used for fried chicken, and with roasted vegetables. You’re even seeing it more and more used in fish dishes and with tofu.
You don’t have to buy the pre-blended Poultry Seasoning. It’s quite easy to create your own, or, you can have the Red Goose Spice Company make one exactly to your specifications if your usage complies with our minimums.
How to Make Poultry Seasoning
Sage and thyme are THE 2 key ingredients in this blend, and as such, you want to be sure that BOTH of these herbs are fresh and full of flavor.
This recipe is a volume recipe, as such, if you are using rubbed sage instead of ground sage, or leaf thyme instead of ground thyme, you will need to use nearly twice as much, as it will be less compacted in your measurement container.
You should also consider blending it with a food processor to ensure that all of the particulates distribute throughout the blend equally.
If all of your ingredients are ground, then all you have to do is stir or toss them to give you an equal distribution.
Lastly, after creating your blend, you’ll want to store it in an air-tight container in a cool place, to extend its shelf life.
Poultry Seasoning Recipe
Makes approximately 6 cups
2 Cups Ground Sage
1 ½ Cups Ground Thyme
1 Cup Ground Marjoram
¾ Cup Ground Rosemary
1/3 Cup Ground Nutmeg
1/3 Cup Ground Black Pepper
As mentioned, you can substitute oregano for the marjoram. You can also consider customizing this recipe by adding onion powder, garlic powder or any one of the other herbs or spices we’ve mentioned.
Whether you purchase a finished blend, or create one of your very own, fall is a wonderful opportunity to revisit Poultry Seasoning, one of the most popular seasoning blends in a Chef’s repertoire.
The Red Goose Spice Company is a valuable resource for all of your seasoning needs, whatever the season, and whatever your recipe needs are.
With St. Patrick’s Day right around the corner, we’ll spare you all of the usual traditional Irish phrases and “corny” or should we say “corned-e” history lessons.
Save one.
Did you know that the word “corned” in reference to the popular curing of meats actually comes NOT from the residents of Cornwall, England, (the Cornish), but, (according to most historians), from the fact that the original meats used in this preservation process, were preserved using, among other ingredients, salt.
Not just any salt, but salt, potassium nitrate, the size of corn kernels.
This corn sized salt is supposedly responsible for the name “corned”.
Interestingly, it’s a phrase actually attributed to the English, not the Irish, even though the Irish were more well known for their salt cured and processed meat recipes.
Of course, today’s recipes still use salt, (most often kosher or sea salt to avoid the iodine taste), but it’s much finer.
We also, nowadays, use a different meat that was originally chosen by both the English and the Irish for “corning”, which was pork.
Usually from the belly.
In England, and throughout Britain, pork was cheap and plentiful for the commoners who prepared this dish.
Beef however, was a luxury.
All that changed when their migration to America began. Beef was more plentiful, and relatively cheap.
The switch was on.
One thing did stay the same. They stuck with the same primal cuts of beef, as they once used from the hog.
That is, the belly or brisket.
Corned beef was here to stay and became the preferred meat for this corned dish, now so closely associated with Ireland and St. Patrick’s Day.
What about Pastrami?
The difference between corned beef and pastrami.
There are a lot of similarities between corned beef and pastrami but there are some significant differences as well.
Here is a simple explanation:
The similarities are:
They come from the same “general” vicinity of the animal (the brisket or belly/navel/deckle/plate area). Corned beef almost exclusively from the brisket cut and pastrami mostly from the plate or navel area).
They are both cooked with moist heat (not roasted.)
Both are cured.
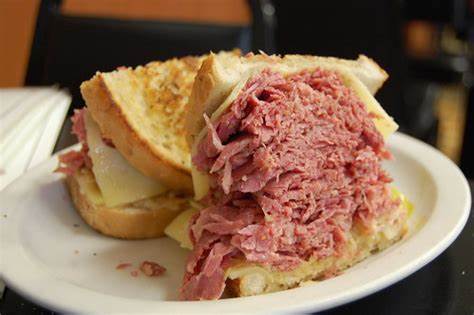
Both make iconic deli sandwiches!
The differences are:
Corned beef is boiled or simmered while pastrami is generally steamed.
Pastrami is smoked, corned beef is not
The seasonings are slightly different, generally, pastrami is a bit more seasoned and uses black pepper prominently.
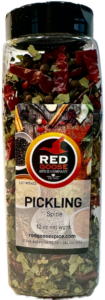
Whether you enjoy preparing Corned Beef OR Pastrami, one of the things that you can always know is that the Red Goose Spice company not only has all the herbs and spices you need to create both of these amazing and historic dishes, but we carry a Pickling Spice Blend that is just outstanding!
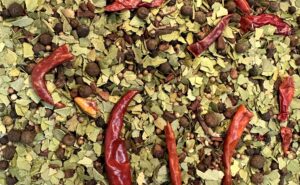
This is no wimpy, off the supermarket shelf, down the middle of the road pickling spice recipe, but instead, chocked full of crushed bay leaves, cinnamon, mustard seed, allspice berries, whole black pepper, coriander, whole chiles, dill seed and whole cloves.
For most Chef’s, preparing a Corned Beef brisket isn’t something you do every day.
It may actually be something that you only tackle once a year?
These 5 TIPS will give you a great start in making this years Corned Beef Dinner one of the best ever.
The first thing you have to decide is whether you’re buying a pre-cured brisket or, curing one of your own.
If it’s the latter, you’d better start now because typically, a brisket takes at least 7 days to properly cure.
The good news is that the Red Goose Spice Company makes a fabulous Pickling Spice Blend that is simply amazing and it’s our TIP # 1, right out of the gate.
From there, consider these 4 additional tips.
Trim your brisket and then totally submerge it throughout the refrigerated curing process, in this curing brine recipe below for a whole, 5-to-6-pound brisket. The optional pink curing salt is not essential.
Place all of the above ingredients in a sauce pot of sufficient size, and bring to a simmer.
Remove from the heat and refrigerate the brine until cold, leaving all the pickling spice in the brining liquid.
Once the brine is cold, place your raw brisket in a non-reactive pan or food service storage container and pour the brine over the brisket to cover. Weight down the brisket so that it stays completely beneath the surface of the brine at all times.
Cover the container and keep it in a secure area of the fridge.
Inspect the brisket daily to be sure it remains beneath the brine. You may turn it over every other day to ensure the brisket is being evenly cured.
Brine for a minimum of 7 days. 10 is even better.
Ok, so, if you’ve “corned” your own brisket, wonderful. Regardless, our # 2 TIP gives you a bit of additional flavor AND color to both the brisket and to your resulting broth.
Once your brisket is cured, rinse off any brine, pat it dry, then add a bit of vegetable oil to a MEDIUM hot pan, or griddle, and sear it on both sides until lightly browned. Nice and slow now, not too hot and don’t let it get too browned.
Remove the brisket from the pan and then sauté a couple of white onions, 2 large carrots and 2 ribs of celery, all cut in 1” to 1 ½” pieces. While sauteing, throw in a few whole garlic cloves at the end. The vegetable should have just a bit of color.
You’re sautéing these vegetable to extract some of their sulfur in the onions (and garlic), which in turn will make the resulting broth a bit better.
So, what are the best ways to cook corned beef brisket?
Depending on the number of briskets you’re cooking and the equipment available to you, you have a number of options at this point.
Sous Vide
Slow Cooker / Crock Pot
Braising (Covered in the Oven)
Range Top Simmering (The Traditional Method)
For all of the above cooking choices, we recommend that you strain the original brine mixture, and save the resulting herbs and spices.
TIP # 3 Rather than using just water and a bit of the spices, to cook the brisket in, consider using ½ water and ½ low sodium beef broth or stock. Other options are apple cider and water.
TIP # 4 Sous Vide is considered to be, by far, the best method of cooking corned beef but unfortunately it has some drawbacks, the first being that you may not even HAVE a Sous Vide device, and even if you do, not one large enough to cook a good size brisket… or 2 or 3.
If you do however, we recommend cutting the briskets in half, placing each half in a sous vide bag, then adding 1 tablespoon of the pickling spice, half of the sauteed vegetables and approximately a cup of the water/broth mixture before vacuuming the bag.
Set your Sous Vide for 180 F and your timer for 10 hours. You should have a tender, succulent and juicy brisket you’ll absolutely love.
A second sous vide option is to simply rinse the brisket after fully brining, then vacuum sealing with no additional garnishment, vegetables, spices OR liquids in the bag.
For the remaining 3 cooking choices, the procedures are pretty much the same.
Place the seared brisket in the crock pot, the stove top pot or in a brasier, add the sauteed vegetables, a tablespoon or two of the pickling spice, then your liquids.
If you choose the crock pot and braising method, you only need enough liquid to barely cover. For the stove top method, you’ll want to have nearly double as it is (generally) uncovered.
Cooking times comparison:
Sous Vide: 10 Hours at 180 F.
Crock Pot: 8 hours on a LOW setting to 5 hours on a high setting.
Oven Braising: 3 to 4 hours at 325 F.
Stove Top Simmering: 3 to 4 hours (simmering in liquids)
Once your corned beef briskets are fully cooked, remove them from the cooking broth and reserve until sliced. The broth itself can be strained and used as a jus or, used to cook the traditional vegetable garnishes including cabbage, small potatoes, onions and carrots.
Lastly, our # 5 TIP is that you don’t need “Irish Luck” to successfully cook a delicious corned beef brisket dinner this St. Patrick’s Day.
Even Chefs get stuck in a seasoning rut once in a while.
We tend to fall in love with OUR favorite recipes.
The tried-and-true favorites we often call them.
And while our favorite recipes are great…you can’t go back to that well too many times without eventually creating a “stale” menu.
Even without realizing it.
The phrase “variety is the spice of life,” has never rang truer than when it comes to deciding what should be on your future menus, and when to consider “retiring” some “old favorites” to make room for some NEW favorites in 2023.
Yes, there will always be a few customers that will perhaps lament about losing a dish that they love, but consider the fact that they may also be one of the many customers that are desperately trying to get out of their time-share resorts.
First experiences can be magical, and for a while it’s THE “thing.” But sometimes, the magic just wears off.
People, whether they admit it or not, do like some variety.
With that said, we’d like to give you some “spicy” options that you may never have tried, to head you on a new course this year.
Five seasoning blends that just might change the way you cook in 2023.
Not surprisingly, most of these blends are from the ancient HOME of spice blends, namely the Middle East.
Even if your customers aren’t necessarily big into traditional Middle Eastern fare, don’t let that deter you. Most all of the spices that make up these blends are ones that your customers are VERY familiar with, including savory spices like cumin, coriander, paprika, fennel, and marjoram as well as sweet spices like cinnamon, ginger, and cardamom.
Adding a bit of these unique spice blends to your current or future recipes can add an enormous range of interesting flavors in your culinary arsenal this year.
Most commonly found in the cuisine of Tunisia, Algeria, and Morocco.
Kasbah of the Udayas in Rabat, the capital of Morocco
Ras el Hanout translates from Arabic into English as “head of the house.” Meaning it’s the best and highest quality blend a seller has to offer.
Similar to curry powder, the recipe of herbs and spices that make Ras el Hanout, as well as their ratio to one another, can vary from shop to shop. You can however, expect to see the “usual suspects” such as: cardamom, black pepper, cumin, ginger, allspice, cinnamon, nutmeg, clove, chili peppers, coriander, fenugreek, paprika, turmeric, and coriander seed to be in most all of the blends.
Safe to say, that unless you go to the trouble of making your own blend “in-house,” it’s best to find one to buy that you like and stick with it. Especially when you consider that many traditional recipes use more than 4 dozen herbs and spices in their recipes!
Of course, as you might expect, Red Goose has created a traditional blend what we think you will thoroughly enjoy.
Ras el Hanout is pretty much a 50/50 sweet and savory spice blend with a mild amount of heat, if any at all. Its complex flavor is typically used as a meat or a fish rub in specialty dishes.
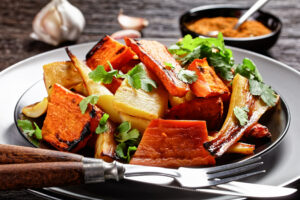
Moroccan roasted root vegetables: parsnip and carrot with Ras el Hanout .
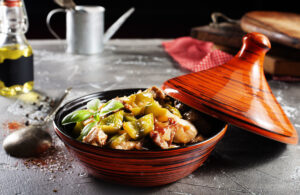
It’s also added to pasta or rice as a flavoring, and stews and meat casseroles cooked in a tagine.
The main ingredient in Harissa is chiles, so it’s no wonder that this North African spice blend was created by this region after chiles were introduced there in the 14thcentury by spice traders.
Spicy hot, is probably the best way to describe Harissa.
You’ll often find it used as a condiment when it is pureed with olive oil and/or water. Considering its name derives from the Arabic term meaning “to crush, grind, or puree,” it’s quite often how this spice blend is used, as it creates a condiment similar to sriracha and Tabasco sauce.
The dry Harissa blend is also used as a meat rub (especially kabobs), and as a flavoring in stews, soups, vegetables, and rice dishes.
Its flavor is considered to be spicy, peppery and a bit smoky and its typical ingredients include more savory than sweet spices which include: chili peppers, coriander, paprika, red pepper, dehydrated garlic, salt, cinnamon, caraway and ginger.
Biryani spice is named after the rice dish called biryani, developed by the Muslims of South Asia. This dish eventually spread throughout India, Thailand, and Malaysia.
Similar to how curry powder came into being, the blend, represented the usual combination of individual herbs and spices used to make Biryani, and if you buy the blend, it makes the final preparation much easier.
While the ingredients and their proportions vary from region to region, the most common ones are: fennel seeds, cumin, turmeric, nutmeg, black pepper, cloves, cardamom, cinnamon, bay leaves, coriander, mint, ginger, dried onions, green chiles, star anise, allspice, and garlic.
As is true with curry powder, once again there are many spice blend recipes for Biryani, and they all differ according to their region and all with different pre-fix names as a result.
Indian Chicken Biryani served in a terracotta bowl with yogurt over white background. selective focus
For example:
Sindhi biryani, which is popular in Pakistan.
Hyderabadi biryani: This biryani is one of India’s most popular types of biryani.
Malabar biriyani: From the Indian state of Kerala.
Calcutta/Kolkata biryani, likewise from Calcutta
Ambur biryani: From the leather-tanning city in Tamil Nadu
Lucknowi biryani: Based on the Persian cooking style.
Mughlai biryani: With cheese curd, chicken, almond paste, ghee, dry fruits, and green chilies.
More savory spiced than sweet spiced, Zahtar or Za’atar Seasoning (not to be confused with the herb za’atar, a wild, mint-related herb similar to oregano and marjoram), is a mainstay seasoning blend popular all over the Middle East.
Once again, and forgive me if you’ve heard this story before, its recipe varies from region to region adding or subtracting various herbs as spices to satisfy the tastes and traditions of the locals.
While the original recipe does call for the use of the za’atar herb, its not easy to find. So more often than not, the recipes use thyme, oregano, or marjoram as a substitute.
The other key components in Zahtar are sesame seeds and sumac while still others add: dill, savory, cumin, fennel, coriander, orange peel, caraway seed, cinnamon, allspice, hyssop, and even rose buds!
Being a more “savory” flavored seasoning, Zahtar can be used in so many ways, such as: a meat rub, in hummus, as a topping on crusted breads, and even in salads and salad dressings.
It is however, recommended that if using Zahtar seasoning in a cold dish recipe, that it first be “bloomed” by adding it to a heated oil to help release its full flavor potential before then adding it to the recipe.
Translated to “pepper” or “hot,” you’ll love this 5th century Ethiopian spice blend used in its national dish Doro Wat, which is a spicy chicken stew, or, perhaps mixed with oil, mead, or red wine to make a condiment called awaze.
Made from key ingredients such as: red chili peppers, fenugreek, ginger, coriander, cardamom, allspice, cumin, peppercorns, cloves, cinnamon, and some lesser-known spices grown in that region such as korarima, ajwain, and long pepper, its complex flavor is known as slightly spicy with warm notes of citrus.
The Ethiopian traditional, delicious Derek tibs meat dish
Berbere is also used as a meat rub, in braised casserole dishes, and when used as awaze, as a dipping condiment for breads.
Of course, ALL of these seasoning blends are readily available at the Red Good Spice Company and we hope that you’ll take the opportunity to try one or all of these amazing seasoning blends as you create some of your NEW favorite dishes of 2023!
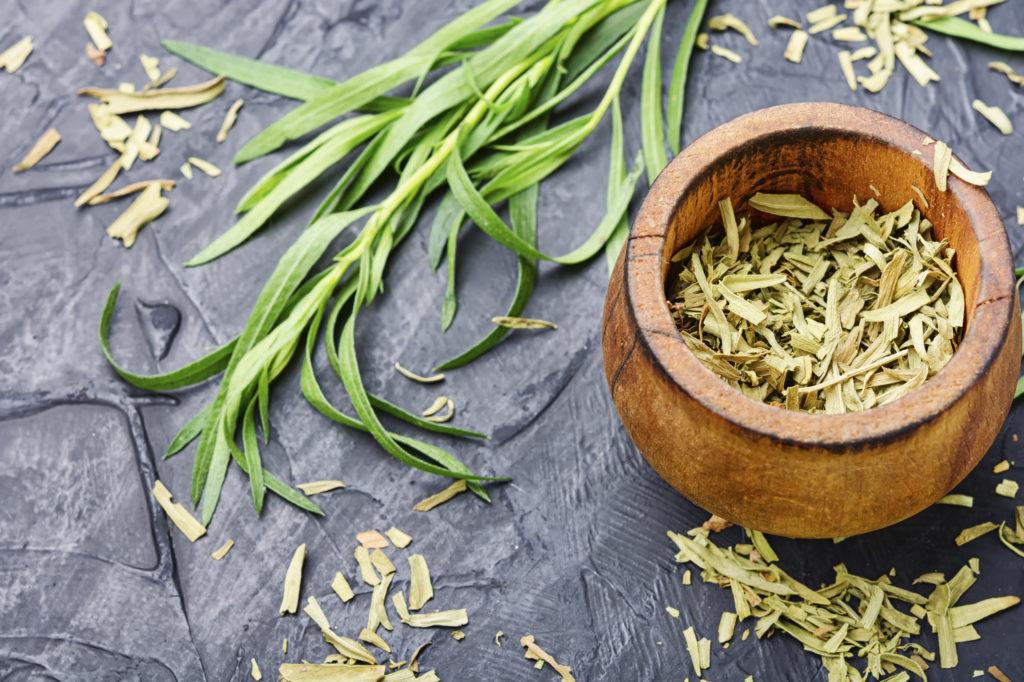
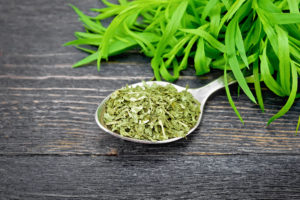
If there was a Mount Rushmore of herbs, tarragon would certainly be a strong contender.
Its glossy, slender leaves and highly aromatic, licorice/anise-like flavor, (with a bit of peppery, mint finish), is unmistakable in any dish it’s used in.
And for good reason.
Tarragon is one of the key components of the French herbs mixture known as “Fines Herbes”, which “classically”, consists of: tarragon, chervil, parsley and chives.
Some say that tarragon provides an elegant addition to so many recipes, from salads, almost ANY protein, and numerous soups and sauces as well.
Others say that it’s licorice flavor makes it a “love it, or hate it” herb. Much in the same way that some people feel about cilantro.
But make no mistake, this herb is a star among the many who know that tarragon is an essential herb in any kitchen.
The most common tarragon used in cooking is the French variety, which pairs brilliantly with chicken, fish, and in egg dishes.
With the addition of garlic and shallots, it’s also remarkable in compound butter used as a garnish over char-grilled beef steaks.
Additional varieties of tarragon include Spanish/Mexican and Russian.
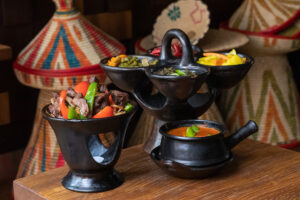
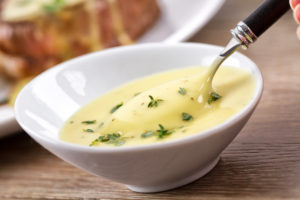
But perhaps the MOST widely known use for tarragon is in the classic sauce, Bearnaise, which is a derivative of Hollandaise sauce. It’s often used not just once, but 3 times within the recipe. First as tarragon vinegar, the second, as part of the tarragon reduction, and lastly as a chopped garnish.
Each form of tarragon, introduces its own unique contribution of flavors which meld together so completely in the final sauce.
The French love this classic herb, but it’s also popular in other countries around the world, and used in salads, stews, soups, pickles, pastries and even soft drinks!
It’s also an herb which can be used in the same dish both dry and fresh as BOTH uses take on their own unique flavor properties and truly complement each other in the recipe. Such as is the case with sauce Bearnaise.
Dry VS Fresh
Tarragon’s oils intensify during the drying process.
When using dry tarragon versus fresh chopped tarragon in a recipe, the usual substitution ratio is 1 tsp dry to equal 1 tablespoon of fresh.
When you mention the word, “tarragon” nearly anyone would immediately associate it with “Sauce Bearnaise” and for that reason, it’s a good recipe to share with you here.
Bearnaise is one of 5 “Grand Sauces” that all chefs and devoted cooks learn to make early on. It’s also one, that non-professionals are told is just too difficult to even attempt.
Hollandaise sauce is made from only 4 basic ingredients, but it’s the 2 main ingredients (egg yolks and butter) that can give you real headaches if you don’t to pay attention to what you’re doing.
Here’s how you avoid the headaches, and to show you, we’ll make an average-sized recipe of Bearnaise sauce.
Start by making the tarragon Bearnaise reduction which you will add to the Hollandaise sauce once it is finished.
Set this reduction aside, THEN begin your Hollandaise sauce.
Bearnaise Reduction for Hollandaise Sauce
2 TBSP Dried Tarragon Leaves
1 TBSP Chopped Fresh Shallots
¼ Cup Cider or Tarragon Vinegar
¼ Cup White Wine (nothing too sweet)
¼ tsp Cracked Black Pepper
Simmer these ingredients together in a small saucepan until reduced to a wet paste. Be careful not to burn it!
Set it aside and NOW begin your Hollandaise sauce.
Hollandaise Sauce
Makes about 1 Cup
Before you begin to cook your egg yolks, in a microwave on the defrost setting, melt 1 ½ sticks of butter until the fat separates, and then skim off that clarified butter and reserve.
Squeeze the juice from a half lemon and reserve.
Choosing the right bowl and saucepan to make your hollandaise is super important. You want about a small-to-medium-sized saucepan and a mixing bowl that nests within the saucepan, leaving at least an inch of space from the bottom and an inch or so lip at the top. This way, you can easily lift the bowl in and out of the pan as you cook your yolks.
Put only a half inch of water in your saucepan and bring it to a simmer. You should have a space between the bottom of your mixing bowl and the water, and that will mean your egg mixture will be cooking gently over the steam and not directly on the water.
Place 2 egg yolks in your mixing bowl, and for each yolk, a half egg shell of water–in this case 2 half egg shells worth.
This step will help you to cook your egg yolks into a “pudding.” Place the bowl over the simmering water, and using a whisk, beat the egg yolk mixture on and off the steam heat (about 15 seconds each round). This method will take a bit longer to turn this raw mixture into a thickened egg pudding, but it will also prevent your mixture from cooking too fast and turning into scrambled eggs.
When the egg mixture is sufficiently cooked, the whisk will create tracks in the mixture. This will let you know it’s time for the next step.
Remove the water from the saucepan and lay a damp kitchen towel or paper towel over its mouth. Replace your bowl and nest it in snugly. This neat trick will allow you to do the next step more easily.
This step gets everyone in trouble now, but if you just take your time, there’s NO reason you should ever have a problem. You’re going to make an emulsion here by SLOWLY–and the key word is SLOWLY–adding the clarified butter to the cooked egg “pudding.” That means whisking somewhat briskly while adding the clarified butter in very small amounts, especially at first.
Start by drizzling in less than a tablespoon; don’t dump it in all at once. Drizzle it in a thin stream. Once that is incorporated, add another, the same way.
After the 3rd tablespoon, you’ll notice the mixture is getting thicker. Now is when you begin to whisk in a bit of your squeezed lemon juice–about a teaspoon. Continue alternating butter and lemon juice until they’re both used up.
The hard part is over, now all you have to do is add the tarragon mixture you made earlier. Whisk it in briskly and season with a pinch of salt if you like.
Of course, tarragon is one of THE most popular herbs sold at the Red Goose Spice Company. We stock the French variety and is available in any size container or bulk box you prefer.